There are affiliate links below, if you are unsure of what affiliate links are please go to “Disclosures/Disclaimers” and “Privacy Policy” at the top of my HOME page. Affiliate links basically allow me to receive a very small referral fee, but only if you make purchases. Just because you go to the link doesn’t mean that I will receive a referral fee.
Most of you know that I have a Tunisian Crochet Wizard of Oz Crochet-Along (CAL) going on right now (19Dec18). Feel free to join in at any time. This will be my third Tunisian Crochet Afghan that I will complete for a family member. The first two Tunisian Crochet Afghans that I have completed are my Tunisian Crochet Minecraft Afghan and my Tunisian Crochet Guardians of the Galaxy Afghan. All of my graphs that I used to create the two afghans are available for free for anyone to use. My Wizard of Oz afghan has the first 4 blocks free for everyone, but after that, the graphs will be free for Helenmay Crochet Special Donor Members only.
Christmas is coming up fast, and we just finished taking family Christmas pictures. This year we decided to all wear funny Christmas Sweaters for our pictures, and it was a blast! Everyone loved our fun sweaters, and we were stopped numerous times with smiles and holiday cheer. Last year, we wore my Crochet Christmas Elf hats for our Christmas pictures, and that leads me to this blog post.

One of my favorite things to do each Christmas is reminiscing whenever I run across past Christmas family pictures. I wanted a way to hang up the current family Christmas picture, but also be able to easily get the Christmas pictures from previous years. I decided that I would make a Tunisian Crochet Christmas Angel picture holder, and I love how it turned out!!! I am making the graph available for free to everyone, and I will explain how I made it. It is a fun way to practice your Tunisian Crochet skills, and maybe build up enough confidence for you to attempt a full Tunisian Crochet Afghan! Too much crochet fun!
General Materials
My favorite stitch markers:

Etsy Pastiche Accessories has a lot of fun Crochet Stitch markers to choose from.
If your fingers can’t handle the small latches, you may love these adorable safety pins. Double check the price. Should be $6.99 and prime eligible:

Yarn: I used 100% acrylic Medium 4 yarn. I put the yarn colors on the graph.
Free PDF downloadable graph:
Tunisian Angel Christmas Graph
Optional: You can use yarn to Tunisian Crochet in eyes/nose/mouth (You would have to adjust your graph). I chose to use 12mm safety doll eyes for mine. I embroidered the mouth using Prism craft thread.

I doubled up the craft thread and used my tapestry needle to sew on the mouth. I doubled up my beige colored yarn for the button nose.

I didn’t bury my loose yarn ends. I used a fabric backing. I only needed one of the $0.97 fabric rolls by Fat Quarter.
This slideshow requires JavaScript.
I purchased mine at WalMart. They had several adorable ones, and at that price, I couldn’t help but stock them in my craft drawer for later use. They worked perfectly for this Tunisian Crochet project.
The finished approximate measurements of my Tunisian Crochet Christmas Angel Block is 18 inches height x 11 inches width. With my fabric, I cut out an additional 1 inch border. I had excess fabric, and I actually broke out my sewing machine to create a picture pocket:
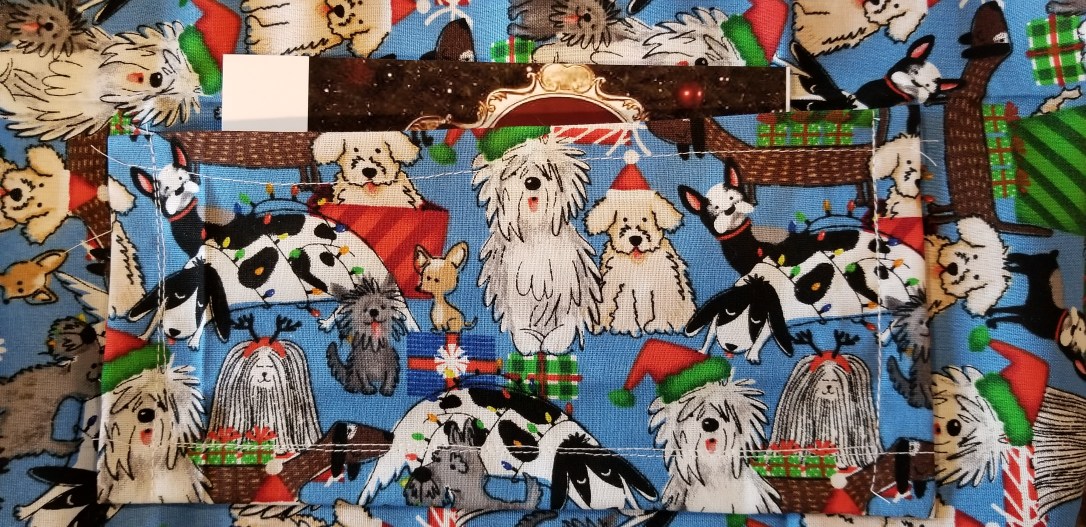
In this back pocket, I placed Christmas pictures from previous years. If you like this idea, I would recommend making this pocket prior to crocheting the backing on the Tunisian Crochet work.
After that, I created an embroidery stitch border. If you need help with how to create an embroidery stitch, then you will like my “Life’s a Hoot Kitchen Towel Topper,” which will show you how.

In the above picture, you can see how I left approximately a half inch fabric border. The embroidery stitch should be on the right side of the fabric.
When you have completed the Tunisian Crochet Christmas Angel Block, you are ready to crochet it on the backing.
This slideshow requires JavaScript.
Place your stitch marker on the opposite side of the side that you are crocheting (This will help you crochet the two pieces together evenly). The wrong side of the fabric and the wrong side of your Tunisian crochet block should be together. I placed my 5.75mm crochet hook into an embroidery stitch on the fabric backing, and then placed my crochet hook into a stitch on the Tunisian crochet block. Bring up a yarn loop through both stitches with your crochet hook, and then tie a knot. Chain 2. You are then going to make a hdc into the same embroidery stitch, but you may finish the hdc into the next stitch on the Tunisian crochet block. For mine, I made 2hdc into one embroidery stitch, but only 1hdc into a stitch on the Tunisian Crochet block (The stitches are closer together on the Tunisian Crochet block, and the embroidery stitches are larger on the fabric backing). The 1/2 inch fabric border that you created while making your embroidery stitch, will be tucked into the wrong side as you crochet. When you reach a corner, I usually place more hdc stitches around the corner stitches to help the corners lay flat. Once you are back to where you started, make a slst into the top stitch of the first ch2 that you made. Finish Off.
This slideshow requires JavaScript.
The hanging strap: I made a chain of 42. Make 1hdc into the 3rd ch from the hook, then 1hdc into each st back across. FO. I sewed each side of my strap approximately 0.5 to 1 inch in from the sides as shown in the pictures above.

Front bottom picture holder:
I made 4 triangles with the same colored yarn:
For one triangle:
- Make a chain of 8 and then 1sc into the 2nd ch from the hook, and 1sc in each st back across (7 total).
- Turn your work, make 1sc into the next st and each st back across. (6 total)
- Turn your work, make 1sc into the next st and each st back across. (5 total)
- Turn your work, make 1sc into the next st and each st back across. (4 total)
- Turn your work, make 1sc into the next st and each st back across. (3 total)
- Turn your work, make 1sc into the next st and each st back across. (2 total)
- Turn your work, make 1sc into the next st. (1 total)
Sew the triangles in place as shown in the picture above. Make sure that you don’t sew into the back fabric. Also, you need the base of the triangles open to fit the picture:

I hope that you have a very Merry Christmas and a Happy New Year!!!