There are affiliate links below. If you are unsure of what affiliate links are, please go to “Disclosures/Disclaimers” and “Privacy Policy” at the top of my HOME page.
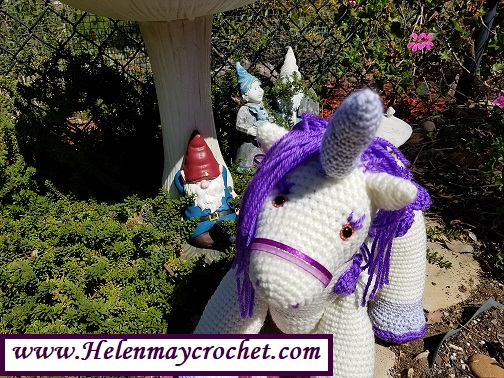
There is a crochet PDF written pattern for the Crochet Magical Unicorn. The written pattern has a zipper portion on the back that is not in the YouTube video tutorial. Please go to the “Contact” button at the top of my HOME page if you are a donor to my blog and you would like this free pattern. Just let me know that you would like the Crochet Magical Unicorn free pattern.
If you are looking for the Crochet Quick, Easy, Beginner, little magical unicorn, here is the direct blog link: Crochet Little Magical Unicorn
If you are looking for the Large Crochet Unicorn, you would use the same pattern as my Large Crochet Mustang Horse (I show the differences to change it into a large unicorn): Crochet Large Unicorn
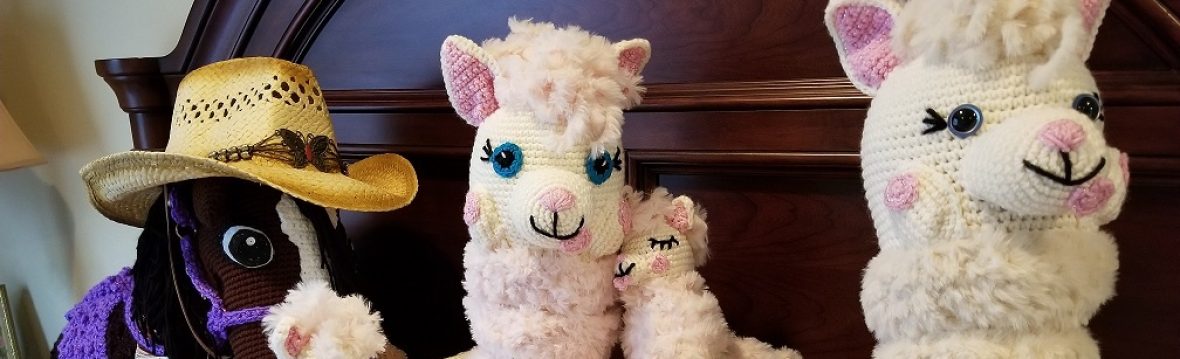
Now, for the Crochet Medium-sized Magical Unicorn:
To help you sew the legs on easier, you may want these sewing needles
To the person that told me about these sewing needles Thank you, Thank you, Thank you!
If you are making your crochet magical unicorn for a child, please keep in mind their age when combining your unicorn with child toys (No choking hazards please).
Here are the links for the toys that I used with my unicorns:
There are affiliate links below. If you are unsure what affiliate links are, please read my “Disclosures/Disclaimers” and “Privacy Policy” at the top of my Homepage.
People who have followed my Helenmay Crochet YouTube Channel over the years know that I crochet a lot. In fact, it is rare for me not to have a crochet hook in my hand. I think it is important to let people know about any important health issues to look for, and I am a huge believer in prevention of medical issues whenever possible. I can’t tell you that you will never develop medical issues, but I can tell you about common medical issues to look for and hopefully help prevent. I will also tell you about my personal crochet habits. Personally, I don’t have discomfort. I have had wrist discomfort in the past, but I would always take a couple of days break until the discomfort is gone and then resume crocheting again. I also take frequent breaks from crocheting and do other things. I make exercise a regular part of my weekly routine. I also try my best to eat healthy as well, which is my biggest challenge.
It is very important that you see your medical doctor if you have any persistent pain, or anxiety, or depression. Also, make sure to see your medical doctor before starting any new exercise regimen.
For those that crochet/knit a lot, we already know the positive effects that crochet has for us personally. I get a lot of surprised responses that I don’t have wrist discomfort from the amount of crochet that I do. I wanted to share some information that I found in different articles that I have agreed with. Some people may be shocked to find that knitting/crocheting can actually possibly prevent arthritis and tendinitis. Keep in mind that the prevention is only possible if you stop if you get discomfort, perform slow stretching exercises, find crochet/knitting hooks that work best for you, and maintain a healthy lifestyle. For me, I found that crochet hook size makes a dramatic effect on wrist discomfort. If I crochet too much with smaller hooks, this requires a lot more fine motor movement in my wrist and causes discomfort. I have to take a lot more frequent breaks using smaller crochet hooks. Also, yarn drag on the crochet hook (more frequent tugging with the crochet hook) causes more discomfort on the wrist, and I require more frequent breaks.
The following information is from the following article if you would like to read more:
“Carrie Barron, a psychiatrist with the Columbia College of Physicians and Surgeons and a knitter, lauds handiwork as a tool for alleviating anxiety and depression. Her husband, Alton Barron, orthopedic surgeon and president of the New York Society for Surgery of the Hand, says knitting can prevent arthritis and tendinitis.”
“Using your hands meaningfully triggers healthy engagement and activity in about 60 percent of your brain, said Alton Barron. The rhythmic, mathematical nature of knitting and crocheting keep the mind absorbed in a healthy way, providing an escape from stressful thoughts but allowing for internal reflection, said Carrie Barron.”
“There’s something so gratifying about taking strings and pieces and making them whole,” she said. “There’s something primitive and innate about that. The fragments of the mind also come together in that process. It’s a parallel process between the mind and the hands.”
A 2011 study from the Journal of Neuropsychiatry & Clinical Neurosciences showed that doing crafts such as patch-working or knitting during middle age, combined with watching less television, decreased the odds of later cognitive impairment and memory loss by 30 to 50 percent, and promoted the development of neural pathways.
Knitting can also improve mood, according to a 2013 survey of 3,500 knitters published in the British Journal of Occupational Therapy. When asked to describe their mood before knitting, 34 percent reported feeling “happy” and 23 percent reported being “a little sad” to “very sad.” When asked to report their mood post-knitting, less than 1 percent remained sad and 81 percent described themselves as “a little happy” to “very happy.”
I can tell you that I feel very happy, especially when I finish a crochet design. This happiness can turn into a crochet addiction. I think it is important to recognize that you need to take breaks and remember to give loved ones your time too. I always explain to people that crochet is like a “really good” book. Once you get started reading, it can be really hard to put the book down, and if you do put it down, you can’t wait to get back to it. Just one more chapter! Just 3 more rows of crochet! Bringing others happiness also can make you very happy. A lot of crocheters/knitters like to crochet for charities.
“It only takes me 10 or 15 minutes to feel the effects,” she said. “It’s the rhythm and focusing all of my attention instead of feeling like I’m being pulled in many directions. Once you start doing it, it’s so rhythmic that it becomes a meditative thing. It really makes my brain calm down.”
Researchers who study therapeutic knitting would tie Wallis’ experience to the “relaxation response” theory conceived by Dr. Herbert Benson of the Harvard Medical School in the 1960s. His work, later continued by other scientists, showed that meditative practices can lower heart rates and blood pressure and can alleviate the symptoms associated with hypertension, insomnia, depression and anxiety.
Knitting someone a sweater, in addition to saving you from holiday shopping, can also be a great workout for the fingers, hands and forearms, said Alton Barron. Moving the joints of the fingers forces fluid to move in and out of the surrounding, sponge-like cartilage, keeping the joints well-hydrated and minimizing the risk of arthritis, he said.
“If you let a joint sit, not only will it get stiff, but the actual cartilage will lose its structural integrity and break down,” he said. “Most of us grow up thinking the more you use something the more it wears out, but that’s not the case with cartilage.”
For those already suffering from arthritis, Barron recommends soaking hands in warm water to loosen the joints before use, and choosing thicker needles, which are easier to hold.
This article was from “Knitting and Crocheting with Arthritis” from arthritis connect
“For someone dealing with arthritis pain, needlework may seem like a terrible idea. Arthritis in hands makes precise, repetitive movements a challenge. However, knitters and crocheters can pick up their needles without worry. Hand-focused activities like needlework can still be a great way to socialize, relieve stress, and even improve dexterity.”
“Work out with yarn”
“People usually think of activities like knitting as hobbies, but they actually have a lot in common with working out. When you knit, you’re using the muscles in your hands, wrists and arms. This will increase their strength and dexterity. The Arthritis Foundation recommends looking at needlework as if it’s exercise, and suggests working in short bursts.”
Psychology Today identifies ways that knitting and crocheting may relieve stress. The repetitive nature of knitting forces your mind to focus on what it’s doing, and not on sources of stress. Giving your mind a break from thinking about worries can do wonders for your mental state. There are also other physical aspects of needlework that may help reduce stress. Knitting and crocheting require eye movement that’s similar to a form of psychological treatment called eye movement detestation and reprocessing (EMDR). The idea behind EMDR is that these eye movements make it difficult for the brain to focus on negative or anxiety-inducing thoughts and memories. Moving your eyes side to side as you stitch may make it harder for your mind to be stressed.”
I find that working with the smaller crochet hooks, and yarn thread, causes my eyes to be strained more. If you notice this too, just switch to a project with a larger crochet hook, and go back to the smaller crochet hook project periodically and take a lot of frequent breaks.
“How to knit/Crochet healthily
Be careful to prevent injury when knitting or crocheting with arthritis. Before you begin, warm up your hands and wrists.”
You should always check with your doctor before starting any exercise routine. If you are wondering about my exercise routine, I love to jog and go to the gym. It is very important to have the right shoes for running/walking. You don’t want shoes that hurt your feet/knees.
I also like Hatha Yoga, which I now do whenever I have sore muscles. It helps to release some of the lactic acid build up in the muscles. I am always amazed how good it feels afterward. I have been using this beginner video for years! I only use the Hatha yoga, but others may like the more advanced yoga part of the video. It is also extremely relaxing if you are really stressed. If you try this Hatha yoga, I have found that the best effects are if you find an open space. It is best to be alone and have quiet as you listen to the yoga instructor on the video: Hatha Yoga
HERE ARE A FEW MORE IDEAS FOR YOUR OVERALL HAND HEALTH:
Start each knit or crochet session with an arm and hand stretching exercise.
If you will be engaging in a marathon knit or crochet session, set a timer for every half hour to an hour. When the timer goes off, stop and stretch again. Vary the time based on your own comfort level.
Consider trying ergonomic tools. Essentially, ergonomics is performing a task in the simplest, most efficient way possible. Ergonomic tools allow you to hold your tool in a more natural pose, therefore reducing the unnatural strain on your hand while working.
“Using these stretches and remembering these tips can help you avoid hand pain all together. However, if you’ve already overdone it a bit, ice is a great anti-inflammatory. Quick ice baths (10 seconds or so) for your hands can help ease the pain and reduce inflammation.
I hope you will find some relief with these tips but remember, especially if you have preexisting health problems or are having consistent pain, consult your doctor.”
I love this article because it talks about some very common ways that people hold their crochet hooks and how it may cause discomfort: 6 popular crochet holds
The reason why I like this article is that if you are experiencing a lot of discomfort, you may want to try to hold your crochet hook differently. I find that there is no right way or wrong way to hold the crochet hook. It all depends on your comfort and the crochet piece that you are able to create.
I show how I hold my crochet hook in this YouTube video:
There are affiliate links below. If you are unsure what affiliate links are, please go to “Disclosures/Disclaimers” and “Privacy Policy” at the top of my Home page.
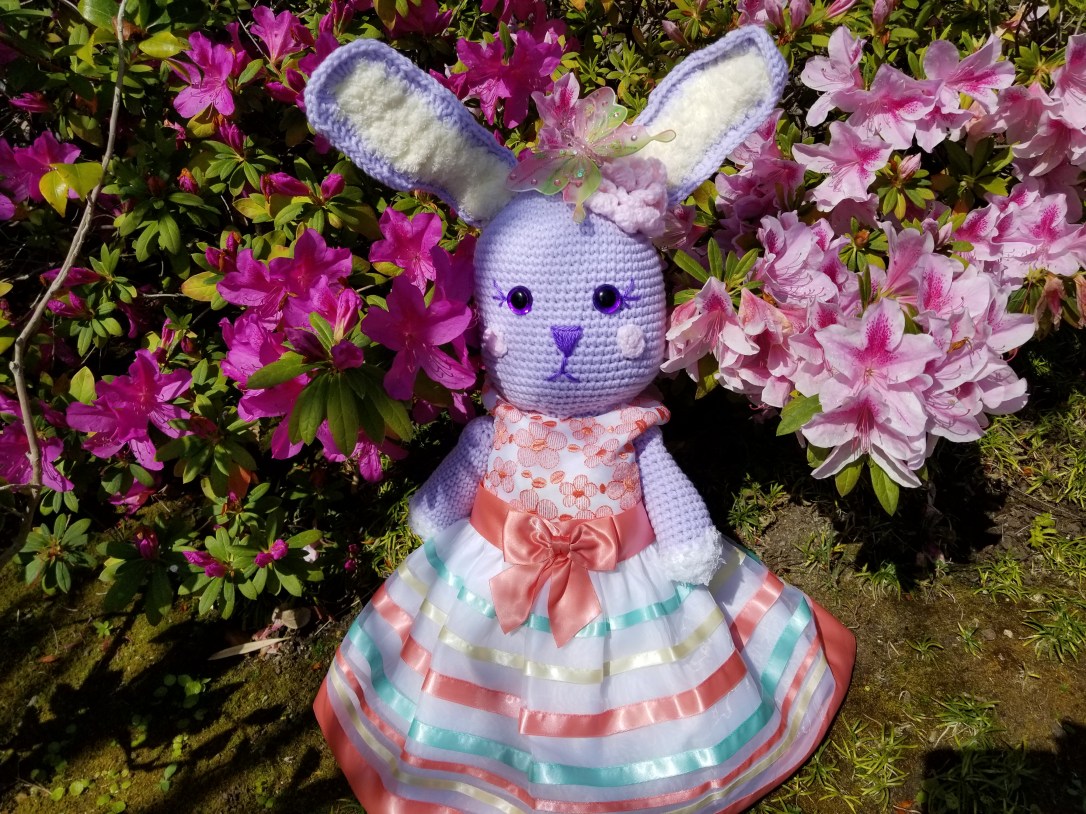
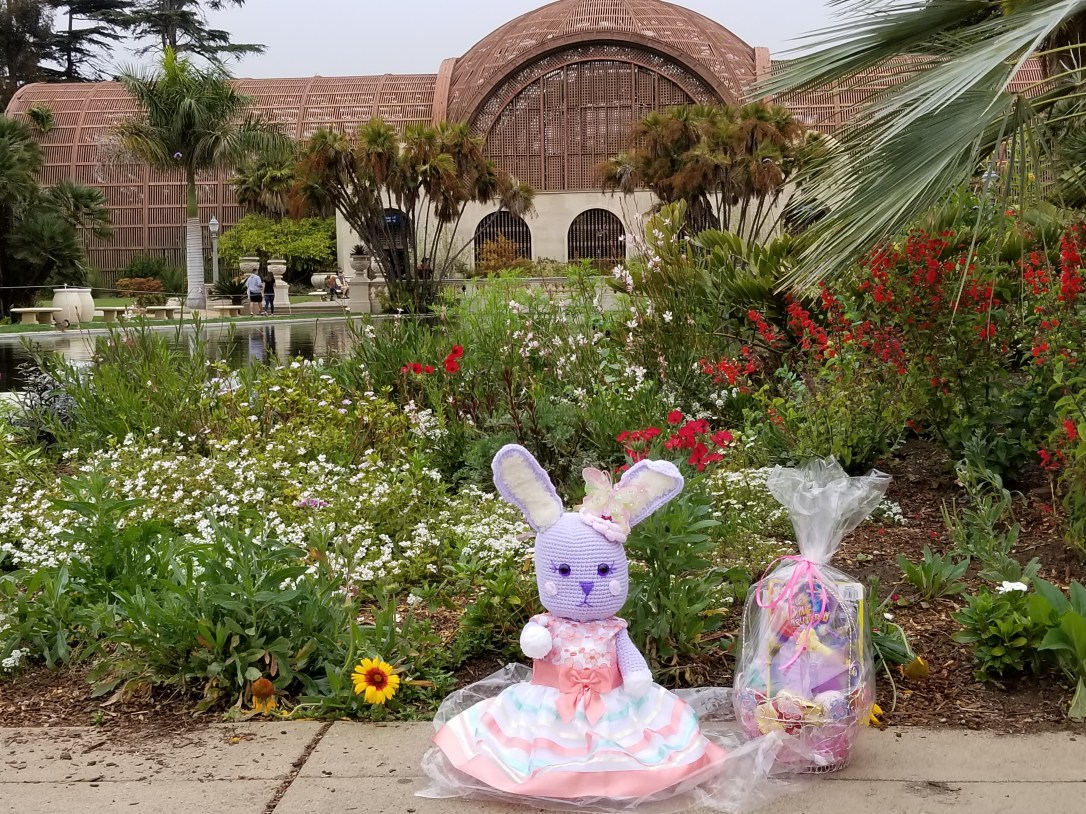
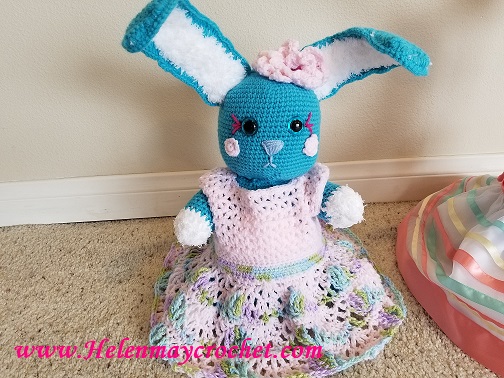
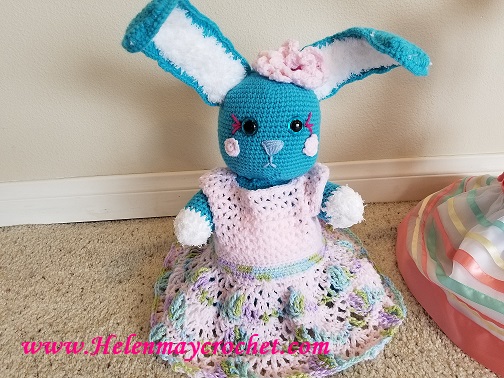
I love to make my Crochet Cute Large Bunny Rabbits. They are my go-to Crochet Easter bunny because they are quick and easy to make. You can use the same pattern to make your own unique crochet bunny. The blue bunny, in the picture above, is “Blossom” and the light purple bunny is “Petunia.”
Petunia fits baby clothes 3-6 months of age. She also fits the Crochet Viz A Vi Cluster Lace Baby Dress. The YouTube video tutorial for the Crochet Viz A Vi Cluster Lace Baby Dress will be after the crochet large bunny written pattern. If you like the dress that I used in the picture above, click here for the same designer and different colors and styles to choose from. Here are some more adorable dresses from the same designer, click here.
You may like this gorgeous set of 3 Easter Baskets to go with your Crochet Easter Bunnies, click here.
Why dress your amigurumi in baby clothes? They make amazing Baby Shower gifts or Easter Gift! Most of them will probably want to keep the dresses on the adorable amigurumi, but if they want to actually use the baby outfits, they can.
Blossom is modeling the Crochet Viz A Vi Cluster Lace Baby Dress. There is no written pattern for the dress. I only have the step-by-step YouTube video tutorial for the dress. The video tutorial is below.
I made a step-by-step YouTube video tutorial for the Crochet Double Cherry Blossom. If you haven’t heard of the Facebook Group Crochet/Knitting Japan, you may want to visit their page. They have a lot of fun crochet stitches. I had seen this on their page a very long time ago, and I have been planning on making a YouTube video for it. Here is the free PDF download of the graph. If you have difficulties reading the graph, you can follow along with my YouTube video tutorial, which can be found after the crochet adorable large bunny rabbit written pattern.
Do you like the butterfly clip? It clips on to the flower and is removable. Click here, for an adorable butterfly clip set (not prime). If you love the set that I purchased in the picture above, I got mine from Big Lots.
The safety doll eyes that I used are CPSIA certified nontoxic. I used purple for Petunia and blue for Blossom, click here to purchase the same safety eyes that I used (20mm).
If you would like to make your own crochet amigurumi rabbit eyes, here is a direct link to the YouTube video tutorial: Crochet Quick and Easy Amigurumi Eyes
If you would like to subscribe to my blog, go to the bottom of this page and “Subscribe to blog via email.”
Crochet Cute Large Amigurumi Bunny Rabbit General Materials list only. This is now a paid written pattern. There is a free step-by-step YouTube video tutorial.
Copying and distribution prohibited. For personal use only.
Crochet Amigurumi Bunny Rabbit Measurements are Approximations:
“Petunia:” Sitting, approximately 16 inches from the floor to the top of the head and 21 inches from the floor to the tip of the ear.
“Blossom:” Sitting, approximately 12.5 inches from the floor to the top of the head and 17 inches from the floor to the tip of the ear.
I purposefully made variations in the crochet written pattern vs the YouTube video tutorial to show you different versions of the same crochet pattern for your own unique crochet large bunny rabbit. This is my favorite crochet bunny rabbit to make for Easter gifts. Petunia and Blossom were made with the same pattern and hook size. The only difference was the yarn used.
GENERAL MATERIALS LIST: You can mix and match yarn colors for different looks. Just be aware that different yarn choices can change the look and size of your crochet bunny rabbit when finished.
Suncatcher Craft Safety doll Translucent multi-colored eyes size 20mm (I used colors blue and purple. On video tutorial, I used the 18mm size black safety doll eyes).
Crochet Hook Size 4.00mm. I used my Size 6.00mm crochet hook as well. I will note which hook size to use.
Tapestry Needle and scissors.
Craft stuffing. I recommend inexpensive pillow stuffing.
**On video tutorial, I used a 20 gauge silver craft wire. Be aware of the different gauge sizes, before buying your craft wire. On video tutorial, I used a 20 gauge silver colored craft wire, which is a lot smaller; The smaller the number, the larger the wire, and vice versa. All of the gauge sizes between 12 and 20 have worked for my crochet bunny ears. For the beginner, I would recommend making the ears without craft wire first. If you are a beginner, and want to try the craft wire, I would recommend the 20 gauge first. My personal preference is the 12 gauge wire.
I WOULDN’T RECOMMEND USING CRAFT WIRE IN YOUR CROCHET RABBITS IF THEY ARE FOR SMALL CHILDREN. YOU CAN MAKE THE SAME CROCHET RABBIT WITHOUT CRAFT WIRE. THE EARS WILL NOT STAND UP, BUT THEY STILL LOOK ADORABLE WITHOUT CRAFT WIRE. You can see some of the crochet large bunny rabbits that I made without the craft wire. There is a separate video tutorial for the crochet bunny pant overalls and bunny hat.
**My yarn recommendations (On You Tube video tutorial, I used some different yarn choices. So, you can see the broad range of yarn choices that you could have when making your own unique crochet bunny rabbits. I also used a larger hook size on video tutorial. Crochet hook size can also alter the size of your rabbit):
2 skeins Impeccable yarn color petunia. Click here to purchase a value pack for this yarn (prime).
If you like my turquoise colored rabbit “Blossom,” I used 1 skein pound of love yarn. I made both so you can see the size differences. Both rabbits were made using the same written pattern, and a 4.0mm crochet hook. “My personal preference is the pound of love yarn.” Click here, to purchase the pound of love yarn (double check the price).
-1 skein Caron Simply Soft yarn color Grape. For Petunia’s nose and mouth. Click here, for bulk buy prime eligible.
Crochet Adorable Large Bunny Rabbit DIY Video Tutorial:
Crochet Viz A Vi Cluster Lace Baby Dress step-by-step YouTube video tutorial:
Crochet Double Cherry Blossom Flower YouTube video tutorial:
Crochet Quick and Easy Beginner Cute Large Bunny Pant Overalls DIY Video Tutorial:
Crochet Bunny Rabbit Hat:
Crochet Amigurumi Eyes:
I used my Crochet Basket Weave Easter Basket with Blossom this year. Here is the video tutorial, if you would like to make the same Crochet Easter Basket. I have more Crochet Easter Baskets on my Helenmay Crochet YouTube Channel:
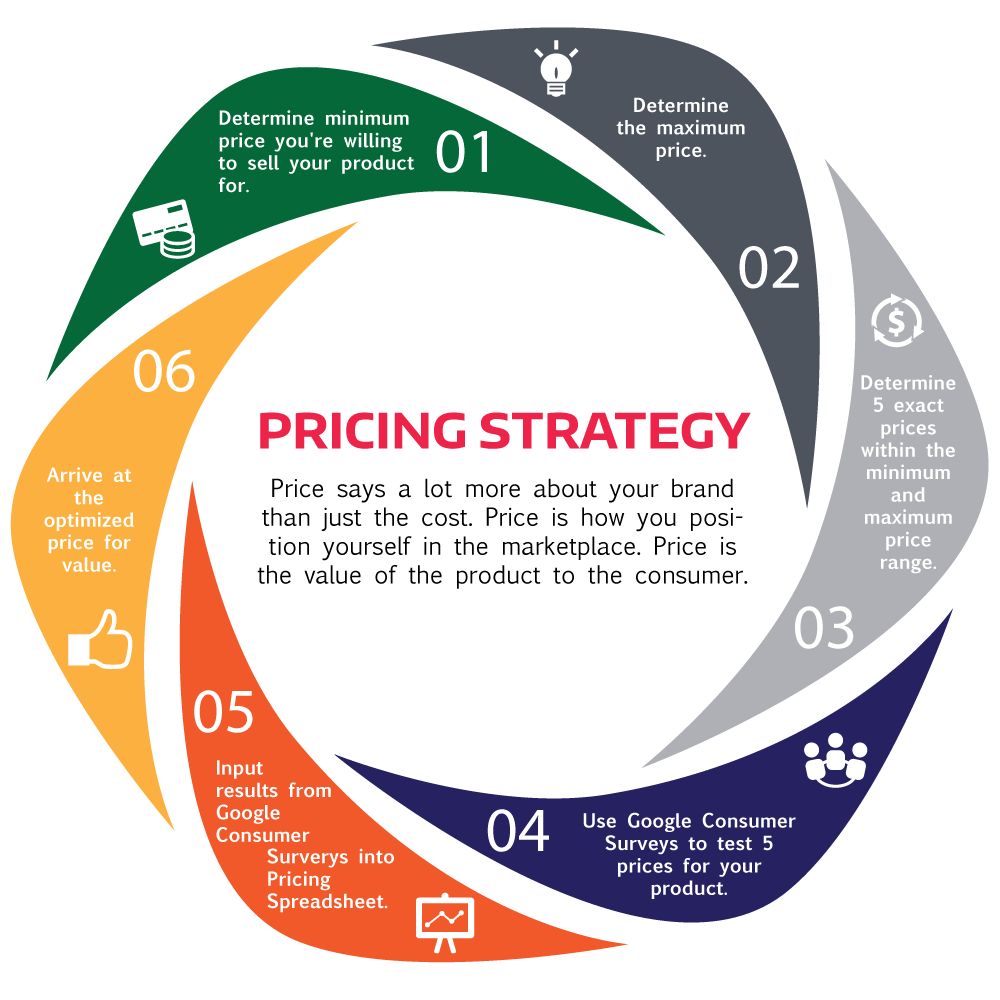
I am sure that people hear this a lot “How Do I Price My Crochet Work?” There have been a lot of blog posts regarding this dilemma. There were a lot of good blog posts about how to price, but a lot of them were pricing in a range that I knew I couldn’t realistically get. So, how can I get a more realistic price for myself and the consumer?
I just wanted to let you know how, and what, I would price for my crochet work. I get asked a lot about how much I would charge for my crochet dogs, but I always tell the people that I don’t sell my crochet work. My love is teaching and crochet designing, but I used to sell before I started my YouTube channel.
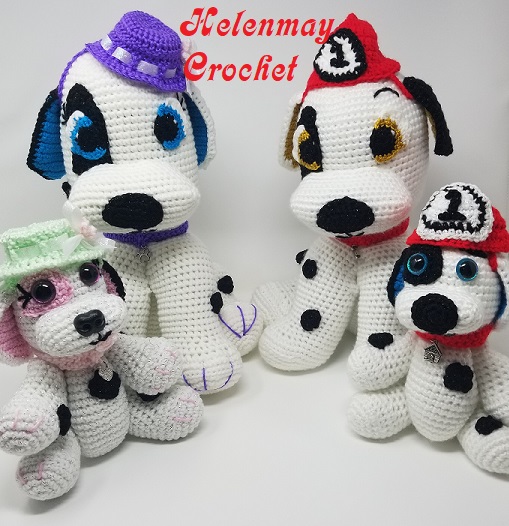
From my personal experience, I will tell you how much I would charge for my Crochet work if I were to sell it now. The Large Crochet Siberian Husky Dogs that you see in the pictures above were donated to the Puppy Love 5k fundraiser, and people bought raffle tickets to win the gift baskets. The money was used for the Helen Woodward Animal Center. I received this email from the Animal Center, and they were asking if I was interested in crocheting the dogs for the person asking to buy the crochet dogs:
This is what the person wrote to the Animal Center:
“I enjoyed seeing the beautiful baskets at the puppy love five k and getting raffle tickets.
If I wasn’t the lucky winner of one of those Siberian husky crocheted dogs how could I get two?
I have a reddish brown husky and a black and white husky.
Does the woman who made these for your event make and sell even if the money went to your center would be nice?
How can I get in touch?”
I responded that I don’t sell my crochet dogs, but she could visit my YouTube channel or Ravelry for the written pattern and maybe commission a crocheter to make one for her.
So, what if I were to sell my Crochet Large Siberian Husky Dog to her? What would I price my crochet large Siberian Husky Dog for?
If I were guestimating:
The first thing I would do is look up the retail price of a similar Large Siberian Husky Dog plush animal online. This is the approximate price that I found: $50
2. Since my crochet Siberian Husky Dog is unique, and the colors can be personalized, I would negotiate a price. I would let the person know that this style of dog goes for approximately $50 online. This person wants 2 dogs so my price would be at least $100 for 2. Since the dogs that I am making are handmade, and in the colors that the person wants, I would add an additional cost. I would negotiate a price between $120-$150 for 2 Large Custom Crochet Siberian Husky Dogs. Any pet outfits would be an additional price, or the person can purchase their own.
This sheet can help you to determine a fair price for you and your customer. There are a lot of price suggesting sites out there, but I have a few additional recommendations of my own. On my worksheet, I still left the “Suggested Selling Cost” which has the formula that most other sites recommend that you sell your products for. It is a useful guide. However, they come up with a price of $468, which I know is the real worth of my Crochet dogs, but I don’t live around a lot of wealthy people that can spend that much on a yarn dog. So, I will show you how I came up with a more realistic price. I am going to use my Crochet Large Siberian Husky Dog as an example. I will show you how I used my worksheet to decide on a price for my crochet dog.
Optional: Place a picture of the crochet product in the top right corner of the worksheet.
Item: Crochet
Description: Crochet Large Siberian Husky Dog
Labor Costs: Skip this for now, unless you are firm on an hourly rate.
Material Costs: I placed all the materials I used here and my total was $20
Miscellaneous Costs: Collar, nametag, pet outfit, jewelry pin total $40
Totals: Add the Material Costs and Miscellaneous costs= $60. Next, find 1st internet equivalent price= No equivalent crochet large Siberian Husky Dogs to compare (None on Etsy and None on Amazon Handmade). 2nd internet equivalent price= Large Siberian Husky Dog plush $67.31 ergode http://www.houzz.com without collar or pet outfit. 3rd internet price= Amazon prime Toysource Large Siberian Husky Dog Plush $89.99. So, with this internet information. I am going to pick the higher price $90. Take $90 and subtract your material cost $20= $70 is your labor cost.
Go back to labor cost and put in $70 for estimated labor cost.
Total Production Cost= labor cost $70 + Material Cost $20 + Misc Cost $40= $130
Go to Suggested Selling Cost and fill out the blanks to come up with a price:
I put Crochet Baby Blanket in the Amazon Handmade search, and there was a price range between $50-$90. Depending on how easy-complicated your crochet baby blanket could fall between that price range, and possibly even higher (if the skill level was high).
Well, I hope that helps. Please comment on this blog post, if you have any other advice for people trying to sell their crochet work.
If you have watched some of my Crochet Amigurumi, Crochet hats, or Crochet bags etc… on my YouTube video tutorials, then you have noticed that I love to use the magic circle.
You may see the magic circle also referred to as the magic ring, or magic loop. Why is it called magic? The reason is that you can easily close the center of the circle. Some alternate crochet methods that try to achieve the same look, may leave an opening in the center of the circle. The magic circle easily eliminates any hole that remains in the center.
I love the chart above, because you can see the look, or shape, that you will create with different stitch counts. I may start using this same chart more for my crochet projects. For those that have used my YouTube video tutorials, you may notice that I tend to start my magic circle with 6 single crochet stitches. You also may have noticed that the stitch count is always predictable as well. For example, my next increase rounds (Increasing the number of stitches in each round) will always increase by 6 stitches, or a multiple of 6.
What does the above chart mean, and how do I read it?
Starting from the far left, you will see that the first couple of boxes have a 1 and an 8. The first number (In this case is 1) represents the round. The second number (In this case is 8) represents the stitch count. This means that for the first round of your magic circle, you are going to place 8 stitches (I will just say single crochet (sc)). Now you are ready for the 2nd increase round. If you look at the second set of boxes, you will see a 2 and a 16. Normally, the second increase round is 2sc in each st around, which will give you a stitch count of 16. The next set of boxes is 3 and 24. The 3rd increase round, is usually 1sc in 1 st, and then 2sc in the second st, repeating this pattern all the way around for 1 round. Using the chart above, you will already know that this will give you a stitch count of 24. Why would this be important for you? It is a way of double checking your crochet work, and you will know why you are getting a particular shape (conical vs flat) as you crochet.
Any crocheter knows that there is a lot of counting with crochet, and you would be amazed at how important Math can be in the art of crochet. You will discover this more as you gain more experience as a crocheter. I have provided a stitch count cheat sheet for free download that may be helpful for you during future crochet projects.