
There are affiliate links below, if you are unsure of what affiliate links are please go to “Disclosures/Disclaimers” and “Privacy Policy” at the top of my HOME page. Affiliate links basically allow me to receive a very small referral fee, but only if you make purchases. Just because you go to the link doesn’t mean that I will receive a referral fee.
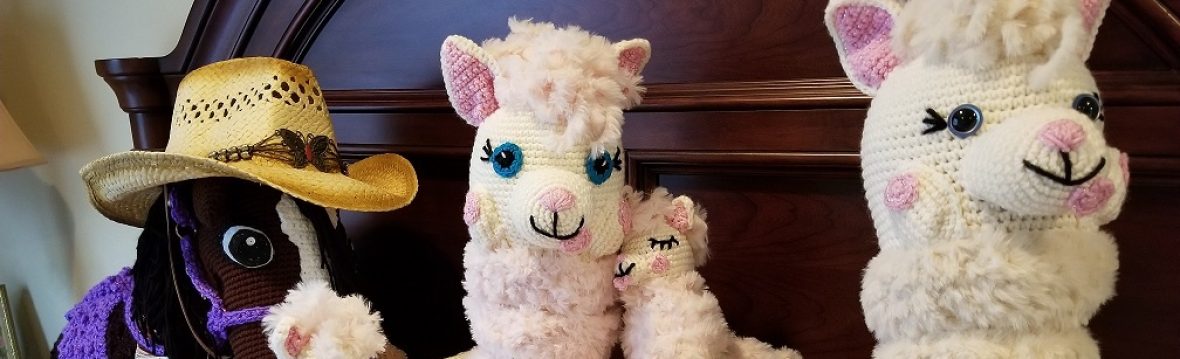
I made a new crochet Afghan Dog for the Helen Woodward SanDiego Surf-a-Thon SoCal Surf Dogs Fundraiser. Finished.
If you would like to purchase the PDF written pattern, here is the direct Ravelry link:
Crochet Amigurumi Afghan Dog PDF written pattern
CAL start date 19Jun18.

Page 1: Intro Page
Page 2:
Copying and distribution prohibited. For personal use only.
ABBREVIATIONS:
Sc= single crochet inc= increase
Ch= chain stitch rnd(s)= round (s)
FO= finish off or fasten off Sl st= slip stitch
Right side= the side that will be showing mm= millimeter (s)
Wrong side= the side that will not be showing. cm= centimeter (s)
dc= double crochet hdc= half double crochet
st= stitch (# total)= stitch count
YO= yarn over
Sc2tog= Single crochet 2 stitches together: Insert your crochet hook into the next stitch, yarn over (YO). Pull the yarn through the stitch on your crochet hook. You should now have two loops on your crochet hook. Insert your crochet hook into the next stitch. YO. Pull the yarn through the stitch on your crochet hook. You should now have three loops on your crochet hook. YO, pull the yarn through all three loops on your crochet hook.
Page 3:
Approximate Measurements: 21” x 24”
GENERAL MATERIALS LIST: You can mix and match yarn colors for different looks. Just be aware that different yarn choices can change the look and size of your crochet Afghan Dog when finished. Also, changing your crochet hook size, will also affect the size of your crochet dog. The following are the materials that I used:
(Caution: I used craft wire in my crochet dog. I would not recommend the use of craft wire in your crochet dog, if you are making the crochet item for a small child.)
–Crochet Hook Size 3.75mm
– 1 Tapestry/Darning Needle
– A pair of Scissors.
– 1 pair of Safety Doll Eyes 20mm (Mine are from 6060 eyes)
– 1 Safety Doll Nose 30mm (Mine is from 6060 eyes)
– Optional: I used craft wire and tubing to add stability to the head and neck.
Wired Accents 12 gauge Aluminum Floral Wire by Darice approx 30 inches. I purchased the plumbing tubing from a hardware store: 12 inch tube, 1/2 inch ID x 5/8 inch OD. Optional tubing in tail: 12.5 inch tube. You will need additional 12 gauge aluminum floral wire folded in half to measure the length of the 12.5 inch tube. Coil some excess wire over on itself, after you have folded the wire in half to fit in the 12.5 inch tube.
– 1 dog brush with flexible wire bristles. You will need a hard surface to brush the yarn on. For example: hardcover book, sturdy cardboard, cutting board etc..
-Glitter Felt: 1 sheet Black and 1 sheet White. Sewing needle and white and black thread. Embroidery scissors work better to cut the small hole in the glitter felt for the safety doll eyes. Optional: Eyelashes. I used Kiss everezlashes. The glue that I used was Gorilla Super Glue with brush and nozzle.
-Craft stuffing. I recommend inexpensive pillow stuffing.
Yarn that I used:
-1 skein Crafters Secret Big Idea, 810 yards/740 meters, 100% Acrylic, color “Magnolia Way.” You will need an additional smaller skein in the same color. I have been able to complete the head and body, and I finished 2.5 legs before running out of the larger skein. You will have plenty of the additional smaller skein to complete your crochet afghan dog. If you are unable to find this particular yarn, Caron One Pound in a beige color will also work, as well as Red Heart Yarn color Off White.
-1 skein Lion Brand Homespun Thick and Quick, 160 yards/146 meters, 88% acrylic/12% polyester, color “Dove.” This brand of yarn comes in all kinds of wonderful colors to try.
-1 skein Red Heart Yarn, color black, for the mouth.
Page 4:
Crochet Amigurumi Afghan Dog Eyes
Page 5:
MAKING THE HEAD, STARTING WITH THE SNOUT: “Magnolia Way” colored yarn.
-Using the magic circle technique, make 6sc into the magic circle.
-2sc into every stitch around (total of 12).
***Alternative to the magic circle:
-Ch2
-work all of your stitches in the second ch from the hook. Do not count the 1st ch you skipped as a stitch.
**Do you need additional practice, or want to learn the magic circle, here is the direct link to my YouTube video tutorial: Magic circle video tutorial
-Increase rounds:
-*1sc in 1 stitch and 2sc in the second stitch. Repeat from * for one round.
(18 total)
-*1sc in 2 stitches and 2sc in the third stitch. Repeat from * for one round.
(24 total)
-Make 1sc in every st around for 4 rounds. (24 total)
-Place your 30mm safety doll nose. Using your magic circle as a landmark, place your safety doll nose 1 round up (Not counting the magic circle round).
-*1sc in 3 stitches and 2sc in the fourth stitch. Repeat from * for one round.
(30 total)
-Make 1sc in every st around for 3 rounds. (30 total)
-*1sc in 4 stitches and 2sc in the fifth stitch. Repeat from * for one round.
(36 total)
-Make 1sc in every st around for 3 rounds. (36 total).
-*1sc in 5 stitches and 2sc in the sixth stitch. Repeat from * for one round.
(42 total)
-Make 1sc in every st around for 3 rounds. (42 total).
-*1sc in 6 stitches and 2sc in the seventh stitch. Repeat from * for one round.
(48 total)
-*1sc in 7 stitches and 2sc in the eighth stitch. Repeat from * for one round.
(54 total) -*1sc in 8 stitches and 2sc in the ninth stitch. Repeat from * for one round. (60 total) -*1sc in 9 stitches and 2sc in the tenth stitch. Repeat from * for one round. (66 total) -Make 1sc in every st around for 6 rounds. (66 total)
Set the head aside for now. We will make the eyes.
MAKING THE EYES: Make 2.
-Using the black and white glitter felt, cut out the oval shapes for the eyes. The smaller oval shape will be the white glitter felt, and the larger oval shape will be the black glitter felt.
Page 6:
(1) Cut out the oval shapes using your white and black glitter felt.
(2) Once you have determined where you would like to place the safety doll eye, fold up the bottom portion of the glitter felt, one at a time, and cut a small x with your embroidery scissors. (3) Use your embroidery scissors to widen the hole. Place the safety doll eye through the white glitter felt and then through the black glitter felt. DO NOT PLACE THE SAFETY LATCH AT THIS TIME.
Page 7:
Place the eyes on the head: The top of the black glitter felt should line up with the bottom of the 3rd row from the top of the head. I placed approximately 6 to 7 stitches between the safety doll eyes. I angled the black glitter felt portion slightly outwards. I used an imaginary line from both sides of the nose to line up the eyes. Once you are happy with the placement, secure the safety latches. I used a sewing needle and black thread to sew down the black glitter felt, and white thread for the white felt. Optional: Next, I used the brush from the Gorilla safety glue along the lateral aspect of the black glitter felt, and gently laid the full eyelash in place (Without getting glue on my hands). I then used the plastic tweezers (or a Q-tip) to push the eyelash down on the glue. I brushed more glue on top of the base of the eyelashes. Let the glue dry before continuing on.
Now, embroider the mouth before closing the head:
Page 8:
CLOSING THE HEAD:
-*Make 1sc into the next 9 st, then Sc2tog. Repeat from * for one round (60 total)
-*Make 1sc into the next 8 st, then Sc2tog. Repeat from * for one round (54 total)
-*Make 1sc into the next 7 st, then Sc2tog. Repeat from * for one round (48 total)
Fill the head with craft stuffing being careful not to over /under stuff. Continue to add stuffing as needed as you close the head.
-*Make 1sc into the next 6 st, then Sc2tog. Repeat from * for one round (42 total)
-*Make 1sc into the next 5 st, then Sc2tog. Repeat from * for one round (36 total)
-*Make 1sc into the next 4 st, then Sc2tog. Repeat from * for one round (30 total)
-*Make 1sc into the next 3 st, then Sc2tog. Repeat from * for one round (24 total)
-*Make 1sc into the next 2 st, then Sc2tog. Repeat from * for one round (18 total)
-*Make 1sc into the next st, then Sc2tog. Repeat from * for one round (12 total)
-Sc2tog until almost closed and then Slst closed. FO.
BODY PANELS: Bottom panel, and 2 side panels. Make 3. Use the same yarn color as the head.
Starting chain- Ch71
Row 1-Make 1sc into the next st and every st back across. (70 total)
Row 2 to 23- *Ch1, turn your work, make 1sc into the next st and every st back across. Repeat from * (70 total)
Top panel: Make 1.
Starting chain- Ch51
Row 1- Make 1sc into the next st and every st back across. (50 total)
Row 2 to 23- – *Ch1, turn your work, make 1sc into the next st and every st back across. Repeat from * (50 total)
Front and Back Panel: Make 2.
Starting chain- Ch25.
Row 1- Make 1sc into the next st and every st back across. (24 total)
Row 2 to 23- – *Ch1, turn your work, make 1sc into the next st and every st back across. Repeat from * (24 total)
Page 9:
SEWING THE BODY PANELS TOGETHER: 3 panels for the bottom and 2 sides, 1 top panel, and 1 front and 1 back panel.
Measurements: 3 panels for the bottom and 2 sides, 17 inches x 5.5 inches
1 top panel, 12 inches x 5.5 inches
1 front and 1 back panel, 6 inches x 5.5 inches
-Sew the bottom panel and 2 side panels together first. Make sure that the ridges (Created by sewing the edges of the panels together) remain on the wrong side.


-Sew the top panel on next, again make sure that the ridges remain on the wrong side.


-Sew the front and back panel on next, again make sure that the ridges remain on the wrong side.


Page 10:
MAKING THE NECK: Use the same colored yarn as the body
Round one-Turn the body inside out so that the right side is facing you. Join your yarn in one of the corners of the neck opening, and make 1sc in every st around.
Round two- The st count for your first round may vary. For the second round, you will want to increase, or decrease, the number of stitches in the round until you have a st count of 76 for the second (or the third round). To increase the number of stitches in the round, make 2sc into the same st. Evenly space your increase stitches around the neck. To decrease the number of stitches in the round, Sc2tog. Evenly space your decrease stitches around the neck. (76 total)
Round three to Round Eleven- Make 1sc in every st around. (76 total)
Do you need a dog collar and name tag for your special, and unique, crochet Afghan Dog? Here is a direct link for some of my recommendations: Dog collars, dog name tags and more!
You may even like the Handmade and/or Custom dog products from Sarahdipiti
Round 12- Decrease Round: *Make 1sc in 8 stitches, then Sc2tog. Repeat from * for one round. Make 1sc in the 6 remaining st. (69 total)
Round 13 to Round 15- Make 1sc in every st around. (69 total)
Round 16- Decrease Round: *Make 1sc in 7 stitches, then Sc2tog. Repeat from* for one round. Make 1sc in the 6 remaining st. (62 total)
Round 17 to Round 19- Make 1sc in every st around. (62 total)
Round 20- Decrease Round: *Make 1sc in 6 st, then Sc2tog. Repeat from * for one round. Make 1sc in the 6 remaining st, and then Sc2tog. (54 total).
Round 21 to Round 31- Make 1sc in every st around. (54 total)
Place your stitch markers on the last round made for the neck. One stitch marker will go in the front center and will be your landmark for placing the other 2 stitch markers. After you place the front center stitch marker, count to the right 15 st and place your second st marker (Don’t count the front center st marker). Now, count to the left 14 st and place your third st marker. Again, don’t count the front center st marker.

If you like my favorite st markers that I used in the picture above, click the picture or here.
Page 11
FINISHING THE NECK:
-Slst. FO.
-Join the same colored yarn where you placed the 2nd st marker in the back of the neck. Ch1, turn your work, make 1sc into the next st and every st, across the back of the neck, to the 3rd st marker. (26 total)
-Turn your work, make 1sc into the next st and every st back across, until you have a total of 23 stitches.
-Turn your work, make 1sc into the next st and every st back across, until you have a total of 21 stitches.
-Turn your work, make 1sc into the next st and every st back across, until you have a total of 19 stitches.
-Slst into the next st. FO. Leave a long loose yarn end for sewing the head on the neck.
Optional: This is where you can add the craft wire and tubing to give more stability to the head and neck of your dog. I used approx 30 inches of craft wire and 12 inches of tubing.
-Fold the craft wire tubing in half, insert one end of the wire into the bottom of the crochet dog’s head and come out 5 st over, keep bringing the wire through until you reach the halfway point of the craft wire. Measure the tubing next to the wire, any wire extending past the tubing will be coiled over on it self. Insert the tubing over the craft wire until it is completely covered and the tubing is touching the dog’s head.
-Insert the tubing into the neck of the dog and surround the tubing with craft stuffing.
After completely stuffing the neck of the dog with craft stuffing, sew the dog’s head in place. Make sure to keep the face of the dog facing forward as you sew. Tilt the head “very slightly” downward to line up with the back of the neck (We crocheted the back of the neck slightly higher than the front of the neck). With your darning/tapestry needle and the same colored yarn, sew the head in place. If you start with the neck and go into the head, then come out of the head (with the needle), go back through the head, and sew into the neck. Come out of the neck (with the needle), go back into the neck, and sew into the head, and vice versa. This will hide your stitches as you sew. Don’t worry if you skip stitches, because the first round is just to maintain the head facing forward. The subsequent sewing rounds will secure the head and sew any remaining stitches that have not been sewn.
Page 12

After you have the head sewed on, we are ready to make the ears.
MAKING THE EARS: Use the same colored yarn as your crochet dog. Make 2.
-Ch15
-Make 1sc into the 2nd ch from the hook and every st back across. (14 total)
-*Ch1, turn your work, make 1sc in every st back across. Repeat from * 11 times (14 total)
-Turn your work, make 1sc into the next st and every st back across, except for the last st. Leave the remaining st unworked. (12 total)
-Turn your work, make 1sc into the next st and every st back across, except for the last st. Leave the remaining st unworked. (10 total)
-Turn your work, make 1sc into the next st and every st back across, except for the last st. Leave the remaining st unworked. (8 total)
-Slst. FO.


Using your tapestry/darning needle, sew loops of yarn to make hair on the ear. The loops of yarn will be approximately 13 inches for the bottom portion of the ear (At the bottom curve of the ear), and approximately 11 inches long for the top portion of the ear (2-4 rows back from the top of the ear). Cut each loop, and tie a knot before brushing out the yarn to create a cottony look. Use a hard surface, that you don’t mind brushing on top of, to brush the yarn on.
Page 13
With your tapestry/darning needle, and the same colored yarn as the crochet dog, sew the ears on approximately 3 to 4 rows back from the black glitter portion of the eyes. Sew the top portion of the ears only, and leave the bottom portion of the ear as a liftable flap.


Make the first row of looped hair across the forehead at the level of the front of the ears as shown in the left picture above. Make a second row of looped hair directly behind the first row, approximately 2-3 rows behind the first row as shown in the right picture above. The length of yarn hair is approximately 13 inches.


Then, sew a row of looped hair across the back of the head between the back of the ears (Picture is above left). The yarn should reach the back of the body, approximately 13 inches. Then sew a row of looped hair at the bottom of the head and above the neck (Picture is above right). The yarn should reach the back of the body. After each row, cut the yarn loops and tie a knot, and brush the yarn using a hard surface (You will have to lay the dog in a position that will allow you to brush the yarn hair.
Page 14
Set your Crochet Dog aside for now.
MAKING THE LEGS: Use the main colored yarn for your crochet dog. Make 4.
-Using the magic circle technique, make 6sc into the magic circle.
-2sc into every stitch around (total of 12).
-Increase rounds:
-*1sc in 1 stitch and 2sc in the second stitch. Repeat from * for one round. (18 total)
-*1sc in 2 stitches and 2sc in the third stitch. Repeat from * for one round. (24 total)
-*1sc in 3 stitches and 2sc in the fourth stitch. Repeat from * for one round. (30 total)
-*1sc in 4 stitches and 2sc in the fifth stitch. Repeat from * for one round. (36 total)
-*1sc in 5 stitches and 2sc in the sixth stitch. Repeat from * for one round. (42 total)
-Make 1sc in every st around for 1 round. (42 total)
-Forming the front of the paw:
-Sc2tog 12 times, then make 1sc in each of the remaining st for 1 round ( 30 total)
-Make 1sc in every st around for 1 round. (30 total)
-Sc2tog 6 times, then make 1sc in each of the remaining st for 1 round (24 total)
-Make 1sc in every st around for 40 rounds. Use craft stuffing as you make your rounds. (24 total).
-Decrease rounds:
-Make sure that your crochet leg has plenty of craft stuffing, but don’t over stuff. Sc2tog until almost closed and then slst closed. FO.
Now, create yarn hair for the legs. Make loops of yarn the same way that you did for the crochet ears, except the loops of yarn will be shorter. Make 1 round of shorter looped yarn approximately 7 rounds up from the paw, and the loops should measure to the bottom of the paw. Make 1 round of longer looped yarn approximately 9 rows down from the top of the leg, and the loops should measure down to the top of the paw. Cut each loop and tie a knot. Brush out the yarn for a cottony look.
Page 15
After I finished making all 4 crochet legs, I used my 12” upholstery needle to attach the legs to the body. I used the main colored yarn with the needle. Make sure that your yarn is long enough so that you have enough to enter both legs and body twice. Start with the front 2 legs, and make sure that the paws are always facing forward. Start with one leg first. I entered the side of the leg, approximately 6 rows down from the top of the leg, and exited at the same level with my needle. Bring the yarn through the leg until you have approximately 5 inches of loose yarn end on the side that you entered the leg. Next, go through the body, approximately 11 rows up from the bottom of the side panel and 8 stitches in from the front panel of the body (Where the front panel meets the side panel), and exit the body at the same level. Bring the yarn through the body, until you have approximately 2 inches of yarn between the first leg and the body. Enter/exit the second front leg at the same level as the first leg. Go back through the leg, and always enter/exit 1 stitch over from where you previously entered, or exited, with the needle. Go back through the body. Go back through the first leg. Repeat this process one more time. After you are finished, gently pull on the loose yarn ends to cinch the legs against the body. If you meet resistance, pull on each yarn end separately. Be careful not to pull too hard, because your yarn may snap and you will have to start the whole process over. After the legs are cinched to the body, and positioned the way you like, tie a knot and bury the loose yarn ends. The back two legs are attached the same way. My back legs were attached 11 rows up and 18 stitches from the back panel (Where the back panel meets the side panel of the body).


After the front/back legs are attached, find the center of the top panel of the body, which is the back of the dog’s body. Starting down the center, make loops of hair that go down the side of the body, approximately mid-leg.


Page 16


As you are making the loops of hair down the center of the back, make sure to leave an area where you will sew the tail in place. I will show how to make the tail after placing the loops of hair.
After you finish placing the loops of hair down the center of the top panel (back), you should have the top panel of the body and both sides of the body covered with loops of hair. Next, you will start at the edge of the top panel (Where the top panel meets the neck) where you have the loops of hair, and continue making loops of hair around the lower portion of the neck to the opposite side. Make sure the loops are long enough to cover the front of the body.


Then make loops of hair across the upper neck from one side to the other. The loops of hair should be long enough to cover the first 1-2 inches of the lower neck loops of hair. You can cut each loop and tie a knot as you finish the rows of loops.
Page 17
TAIL: Use the main colored yarn as the dog.
–Using the magic circle technique, make 6sc into the magic circle.
-2sc into every stitch around (total of 12).
-Increase rounds:
-*1sc in 1 stitch and 2sc in the second stitch. Repeat from * for one round. (18 total)
-Make 1sc in every st around for 49 rounds. (18 total)
-Slst. FO. Leave a long loose yarn end for sewing.
You can stuff the tail with craft stuffing, or an option is to add craft wire surrounded by clear plastic tubing. I used a 39 inch craft wire and 12.5 inch clear plastic tubing. First, measure the craft wire next to the tail. Fold the craft wire in half, any excess wire past the tail is coiled on itself. At the point where the excess wire passes the tail, form a circle, and coil any excess wire within the craft wire circle.
Place the clear plastic tubing over the craft wire circle, completely covering the craft wire. Place a small amount of craft stuffing into the tail, and use the clear plastic tubing with the craft wire to push the stuffing into the tail. Surround the plastic tubing with craft stuffing.
Sew the tail on the back of the crochet dog’s body. Using your tapestry needle, sew all around the base of the tail. Then you can add more loops of yarn hair to cover the back side of the body.
Page 18
OPTIONAL PAINTED CLAWS ON PAWS: I used Caron Simply Soft Party Fuschia Sparkle colored yarn.
At the top of the paw, find the center and count 3 st to the
Right. This is where you are going to exit with your
tapestry needle. Using the magic circle as a landmark,
count up 3 rounds, and enter the paw with your tapestry
needle directly below where you are going to exit with
your tapestry needle.
Pull the yarn through, but make sure that you leave a long enough loose yarn end for tying a knot and burying your loose yarn ends. Go back into the same place that you first entered the paw, and exit the top center portion of the paw (3 stitches to the left). Pull the yarn through, and you completed the first claw.
Go straight down and enter the paw approximately 2-3 stitches to the left of where you first entered the paw for the first claw. Exit the top of the paw 3 stitches to the left of the center claw. Pull the yarn through and you finished the center claw. Go straight down and enter the bottom of the paw 2-3 stitches to the left of the center claw. Exit in the same place where you first entered the paw for your first claw. Pull the yarn through and you finished your third claw. Tie a knot. Bury your loose yarn ends.
Page 19
OPTIONAL CROCHET BUTTERFLY DOG COLLAR: I used 1 skein Caron Simply Soft Party yarn color “Fuchsia Sparkle.”
Starting ch- Ch 68
Row 1- Make 3 tr in the 7th chain from the hook, ch2, in the same st make 1tr, ch2, in the same st make 3tr, ch2, sk3 st, make 1dc into the next st, ch2, sk2 st, make 1dc into the next st, ch2, sk3 st. *Make a butterfly st into the next st, ch2, sk3st, make 1dc into the next st, ch2, sk2st, make 1dc into the next st, ch2, sk3 st. Repeat from * until you have only 6 remaining st. Sk 5 st and make a slst into the last st. (6 butterfly st total).
Row 2- Ch6, turn your work. *In the first 3 treble st from the previous rows butterfly st, make a tr cluster. Ch 5, make 1dc into the center tr from the previous rows butterfly st, ch5, tr cluster in the last 3 tr from the previous rows butterfly st. Ch2, 1dc into the previous rows dc, ch2, 1dc into the previous rows dc, ch2. Repeat from* for 1 row. After you finish your last tr cluster st, ch2, and then make 1tr into the last st, which is the same st that you made a slst into from the previous row.
-FO. Leave a long loose yarn end for sewing the ends of the collar together, and sewing the name tag on.
Sew the crochet collar on the dog, after you have finished making all of the fur. Make sure that the collar doesn’t twist as you sew the ends together. Then, sew your nametag in place.
Page 20
Copyright 2018 by Helen Brady. All Rights Reserved. This pattern may not be used for purposes of mass production. The owner of the pattern may, however, sell the items he or she makes from it.
Crochet Large Amigurumi Afghan Dog Part 1 of 3 YouTube video tutorial:
Crochet Large Amigurumi Afghan Dog Part 2 of 3 YouTube video tutorial
Crochet Large Amigurumi Afghan Dog Part 3 of 3 YouTube video tutorial:
I named one of the crochet Afghan Dog’s “Anastasia” and she went to the Helen Woodward Animal Center Fundraiser for the San Diego Dog Surf a Thon. If you like the Dog nametag that I used, here is the direct link to get your own: SarahDipiti