
Affiliated links are below. If you are unsure of what affiliate links are, please read my “Disclosures/Disclaimers” and “Privacy Policy.”
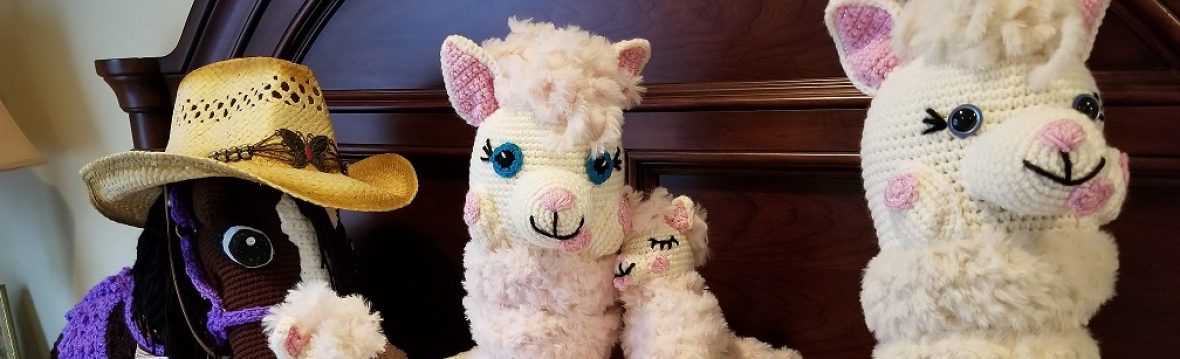
I have compiled pictures (above) that include all of my Crochet Rabbit designs up to 3 Mar 2018. I have everything from extra small, small, and large crochet bunny rabbits. Some of them have malleable ears! I show how I made them in some of my video tutorials. If you would like to go to my Helenmay Crochet YouTube Channel now, to browse through my step-by-step YouTube video tutorials, click here.
My personal favorite is my Crochet Large Adorable Bunny Rabbit.
If you like the black safety eyes that I used, click the affiliate link here to purchase your own.
If you want to try some different colored safety eyes, click the link here, or the picture:

You can also go to my “Ordering Safety Eyes and Noses” button on my homepage, and you will see a variety of different fun safety eyes that you can use.
My Crochet Fiesta Ripple Dress fits my crochet large adorable bunny rabbit, and you can have a lot of fun making the dress with different colors!
For my Crochet Large Adorable Bunny Rabbit Pant Overalls:
Here is my quick, easy, beginner amigurumi bunny rabbit:
If you like the malleable ears, I show you how I made them in this video tutorial:
This link will provide you with your choice of size and color for your craft wire: Different choices for color and size craft wire
The craft wire that I used in the video tutorial works great, but here is the craft wire that I like to use now. Click here to go see it. Be aware that the wire gauge gets larger/heavier as the gauge gets smaller. If you prefer a smaller/lighter gauge wire, here is the direct link: smaller gauge craft wire
Here is a special saving on a bulk buy, 3 pack on a different smaller gauge size: craft wire bulk buy 3 pack
I am currently testing the larger/heavier craft wire on 2 different crochet rabbits for the written pattern that will go here.
Here is my Quick, Easy, Beginner Cute Little Bunny Rabbit with its little crochet carrot:
Helenmay Crochet You Tube Channel
http://tinyurl.com/helenmaycrochet
Crochet Cute Little Bunny Rabbit Written Pattern
Pattern by Helen Brady
Copying and distribution prohibited. For personal use only.
PDF version is also available for free for “Subscribers” to my blog. Go to the “Contact” button on my HOME page and let me know that you would like my Crochet Cute Little Bunny Rabbit PDF Written Pattern. It contains pictures as well.
ABBREVIATIONS:
sc= single crochet inc = increase
ch= chain stitch rnd(s)= round (s)
FO= finish off or fasten off Sl st= slip stitch
mm= millimeter (s) hdc= half double crochet
Sc2 tog= single crochet 2 stitches together DC= double crochet
(Sc2tog: Insert crochet hook into first stitch, yarn over and bring up loop,
insert hook into second stitch, yarn over and bring up loop, 3 loops on
your hook, yarn over and bring yarn through all 3 loops.)
(Rabbits are approximately 5 inches tall)
GENERAL MATERIALS LIST: You can mix and match yarn colors for different looks
– Super soft 4-ply premium worsted weight yarn. I used Lions Brand Pound of
Love yarn: one color for the inner ear, one for the main color of the bunny, and
one for the nose and mouth.
– 100% cotton yarn for the carrot. I used “I love this cotton: super soft, super
savings.” I used an orange color and green color.
– 2 animal safety eyes (12mm or 9mm). I like them both, but prefer the 12mm.
– Size “F” crochet hook (4.00mm)
– 1 tapestry needle
– 1 pair of scissors
Head:
– Using the magic circle technique, make 6 sc into the magic circle.
– 2 sc into every stitch around (total of 12)
***Alternative to the magic circle:
-ch2
-work all of your stitches in the second ch from the hook. Do not count the 1st ch
you skipped as a stitch.
-Increase rounds:
-*1sc in 1 stitch and 2sc in second stitch. Repeat from * (18 total stitches).
-*1sc in 2 stitches and 2sc in third stitch. Repeat from * (24 total stitches).
-Make 1sc in every stitch for 2 rounds (24 total stitches each round)
-*1sc in 3 stitches and 2sc in fourth stitch. Repeat from * (30 total stitches).
-Make 1sc in every stitch for 2 rounds (30 total stitches each round)
-*1sc in 2 stitches and 2sc in third stitch. Repeat from * (40 total stitches).
-Make 1sc in every stitch for 2 rounds (40 total stitches each round)
-Decrease rounds:
-*1sc into 2 stitches then Sc2tog. Repeat from * (30 total stitches).
-*1sc into 3 stitches then Sc2tog. Repeat from * (24 total stitches).
-*1sc into 2 stitches then Sc2tog. Repeat from * (18 total stitches).
Place the eyes and sew on the nose:
-Go to the opposite side of the head (where you want to make your rabbit
face), count down 8 rows from the magic circle on top of the rabbit head, place
your eyes with approximately 4-5 stitches between each eye. Once you are sure
that you have the eyes where you want them, place the safety backing on.
-Use your tapestry needle to sew on the nose and mouth. Center the top
of the nose between the eyes, go two rows down to form a triangle. Fill in the
triangle with your yarn. Go one row down from the bottom point of the triangle to
start the mouth. Go one stitch over and one row down for each side of the mouth.
-Stuff the head with craft, or pillow, stuffing.
-Decrease Rounds:
-* 1sc into one stitch and then Sc2tog. Repeat from *. (11 total stitches).
– Sc2tog and slip stitch the head closed. FO and bury your loose yarn end.
Body:
– Using the magic circle technique, make 6 sc into the magic circle.
– 2 sc into every stitch around (total of 12).
Increase rounds:
-*1sc in 1 stitch and 2sc in second stitch. Repeat from * (18 total stitches).
-*1sc in 2 stitches and 2sc in third stitch. Repeat from * (24 total stitches).
-Make 1sc in every stitch for 6 rounds (24 total stitches each round).
-Stuff the body as you close.
Decrease rounds:
-*1sc into 2 stitches then Sc2tog. Repeat from * (18 total stitches).
-*1sc into one stitch and then Sc2tog. Repeat from *.
– Sc2tog and slip stitch the head closed. FO and bury your loose yarn end.
Sew the head to the body with your tapestry needle
Ears: 2 inner ear color and 2 outer ear color. Both inner ears and outer ears are made the same way: Make 2 inner ears one color and 2 outer ears the same color as your bunny rabbit.
-Make a ch4.
-1sc in 2nd chain from hook. 1 sc in each of the next 2 stitches
(4 total stitches).
-ch1, turn, 1sc in same stitch. 1sc in each of the next 2 stitches. 2sc in the
last stitch (6 total stitches).
-ch1, turn, 1sc in next 4 stitches. 2sc in the last stitch (7 total stitches).
-*ch1, turn, 1sc in next 6 stitches. Repeat from * 5 times (7 total stitches).
-Turn, 1sc in next 6 stitches (6 total stitches).
-Turn, 1sc in next 5 stitches (5 total stitches).
-Turn, 1sc in next 4 stitches (4 total stitches).
-Turn, 1sc in next 3 stitches (3 total stitches).
-Turn, 1sc in next 2 stitches (2 total stitches).
-Turn, 1sc in next stitch. FO.
-Place the inner ear on top of the outer ear. With the inner ear facing up, make
1sc in every stitch along the side of the inner and outer ear.
-Make 3 sc in the same stitch at the top point of the ear.
-1sc in every stitch on the other side of the ear, across the bottom of the ear, and
back to the beginning stitch ( tuck all of the loose yarn ends into the inside of the
ear before reaching the beginning stitch).
-slip stitch into the beginning stitch. FO. Leave a long loose yarn end for sewing
the ear onto the rabbit.
Sew the rabbit ears onto the rabbit with your tapestry needle.
Arms: Make 2.
– Using the magic circle technique, make 6 sc into the magic circle.
– 2 sc into every stitch around (total of 12)
-Make 1sc in every stitch for 2 rounds (12 total stitches each round).
Decrease rounds:
-*1sc into 3 stitches then Sc2tog. Repeat from * Make 1sc in the 2
remaining stitches (10 total stitches).
-*1sc into 2 stitches then Sc2tog. Repeat from * Make 1sc in the 2
remaining stitches (8 total stitches).
-*1sc into 1 stitch then Sc2tog. Repeat from * Make 1sc in the 2 remaining
stitches (6 total stitches).
– Slip stitch the arm closed. FO and make your loose yarn end long
enough for sewing the arm onto the rabbit.
Feet and tail: Make 2 for the feet and 1 for the tail
(you can change colors for the tail if you want).
– Using the magic circle technique, make 6 sc into the magic circle.
– 2 sc into every stitch around (total of 12)
-Make 1sc in every stitch for 3 rounds (12 total stitches each round).
– *Sc2tog. Repeat from * for one round (6 total stitches) and then slip stitch
closed. FO and make your loose yarn end long enough for sewing the feet and
tail onto your rabbit.
Sew on the hands and carrot before sewing on the feet.
-The feet will be flattened into a circle before sewing them on the rabbit.
-The tail will be kept open before sewing it onto your rabbit.
Carrot:
– Using the magic circle technique, make 6 sc into the magic circle.
– 2 sc into every stitch around (total of 12)
-Make 1sc in every stitch for 2 rounds (12 total stitches each round).
-Stuff the carrot as you close it.
Decrease rounds:
-*1sc into 3 stitches then Sc2tog. Repeat from * Make 1sc in the 2
remaining stitches (10 total stitches).
-*1sc into 2 stitches then Sc2tog. Repeat from * Make 1sc in the 2
remaining stitches (8 total stitches).
-*1sc into 1 stitch then Sc2tog. Repeat from * Make 1sc in the 2 remaining
stitches (6 total stitches).
– Slip stitch the carrot closed. FO and bury your loose yarn end.
Carrot stems: Make 2.
-Make a ch4.
-1sc in second chain from the hook.
-1 hdc in next stitch.
-1sc in next stitch. Slip stitch in the same stitch. FO and make the
loose yarn end long enough for sewing the carrot stem on the carrot
(tie a knot with the initial short loose yarn end and the long yarn end
that you finished off with).
-Sew the carrot stems onto the carrot and bury your loose yarn ends.
-Sew the rabbit arms on in a position where your rabbit can hold the
carrot and then sew the carrot in place.
-Sew the rabbit feet on. Flatten the feet like a disc as you sew them
on.
-Sew the rabbit tail on and make sure that the tail is not flattened as
you sew (sew it along the base only).
Sew on the hands and carrot before sewing on the feet.
Flatten the feet into a disc shape before sewing them on.
Sew the tail on, making sure to sew at the base of the tail only.
Copyright 2016 by Helen Brady. All rights reserved. This pattern may not be used for purposes of mass production. The owner of the pattern may, however, sell the items he or she makes from it.
To see more designs by Helen Brady, you can also visit:
Helenmay Crochet You Tube Channel
Ravelry
Be sure to go to my Helenmay Crochet You Tube Channel and check out my different Crochet Baskets to go with your Crochet Bunny! I hope that you will share a picture of your finished crochet work with me on Facebook! I would love to see them! I plan on featuring people’s crochet work on my Home page in the future, depending on how many pictures I receive. I have already received some crochet pictures for March, so look for my featured, crochet work by someone else, at the end of March 2018.

2 thoughts on “Crochet Amigurumi Rabbit Fun up to 2018”