Granny Square Series. So Many Granny Square Designs to choose from!! Check back periodically for new designs.

#1 Design Measures 7 inches x 7 inches.

20180307_124923

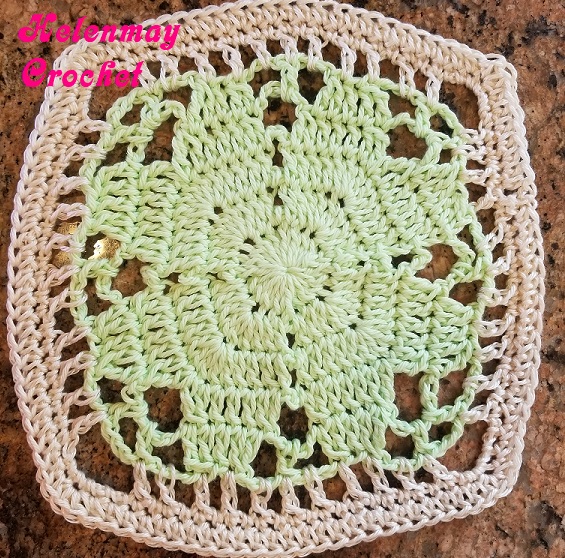
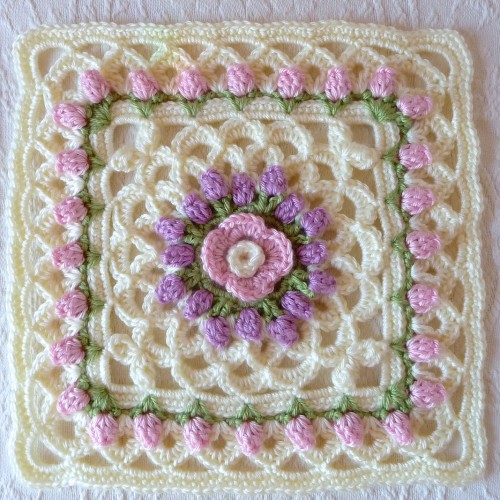
#2 is a Granny Square 4 leaf clover design that measures 10 inches x 10 inches20180307_124928

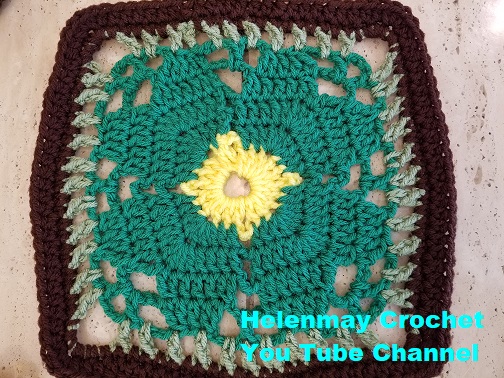
I also made this #2 Granny Square 4 leaf clover design in this color:

20200227_091245

If you like the way the above picture looks, I started with a magic circle instead. If you want to learn how to make the magic circle, here is the link to the video tutorial: Practice video tutorial for the magic circle.  If you would like to learn more about what the magic circle is, here is the direct blog link: All about the magic circle.

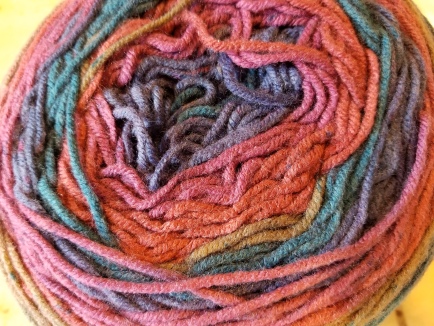
The yarn that I chose was Hobby Lobby’s “I Love This Cotton Yarn” light green color and one of my new favorite Hobby Lobby yarns Yarn Bee Fresh Haven 100% Tencel yarn! I used the beige-colored yarn for my alternate color.

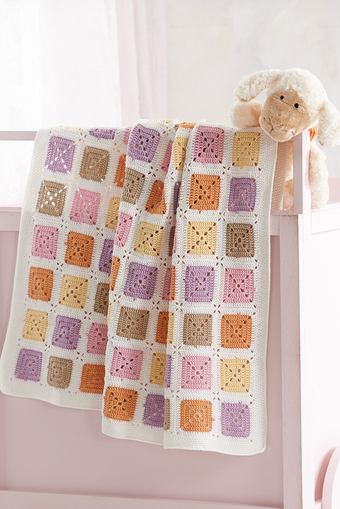
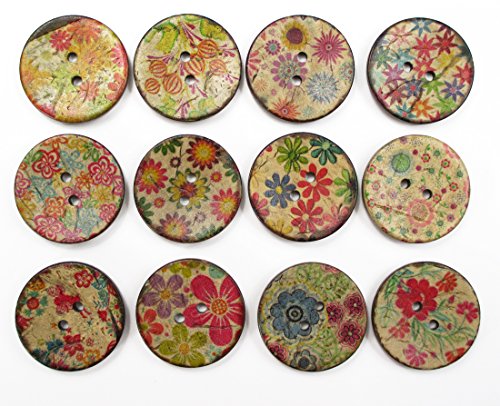
You can make a granny square afghan out of these beautiful finished squares and/or kitchen hot pads!! They make wonderful gifts! To check out more of my fun crochet hot pad/ potholders, here is the direct blog link: Helenmay Crochet kitchen Hot Pad Potholder Dresses

Welcome to my Granny Square Series! Our first Granny Square will, of course, be the Classic Design. I have added a few crochet granny squares that are mine, but as I started this crochet granny square series, I was finding amazing and FREE crochet Granny square PDF downloads! All of the following crochet granny square PDF downloads were free when the links were added to this blog post. ENJOY!!!

Remember Crochet Hook size, and yarn choice will change the size of your Granny Square.

If you have your own completed crochet granny square work, please share a picture with me on Facebook!

From Wikipedia:  Wikipedia Granny Square link.

“Although particular color and pattern schemes for granny squares change with time, this class of motif is a staple among crocheters. Multicolor granny squares are an effective way to use up small amounts of yarn leftover from other projects and basic granny square motifs do not require advanced skills to execute.”

“Any granny square begins with a small loop of chain stitches. Basic granny squares alternate sets of double stitches and chain stitches. Variant patterns use different stitch types or produce other geometric shapes such as hexagons. In order to achieve a distinct angle at the corners, the designer uses extra chain stitches.  Subsequent rounds are added by wrapping multiple stitches around the existing chain stitches. Hundreds of variant motifs are in use and entire books have been devoted to granny square designs.

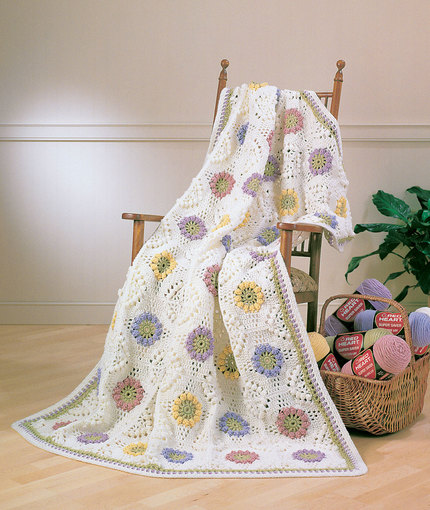
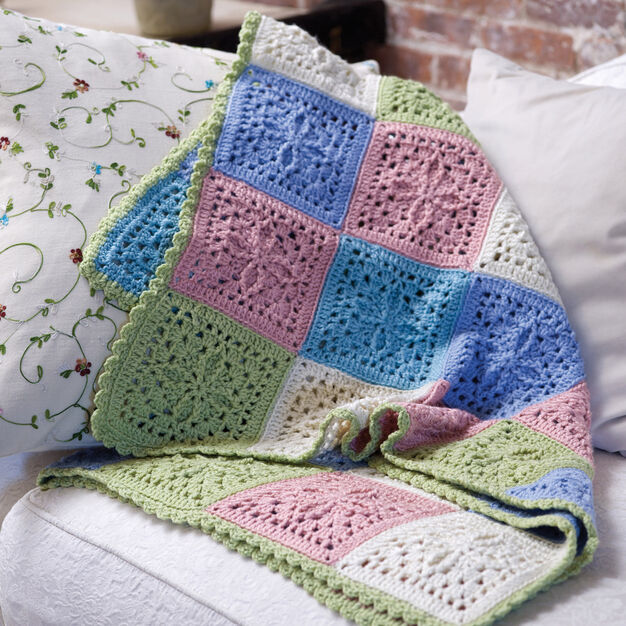
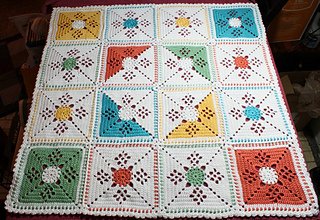
I made a PDF version of the picture that I like to carry around with me, when I am deciding what colors I want to use for the Granny Squares that I am making for my Afghan. The other PDF download shows you an example of a gorgeous afghan that uses different sized Granny Squares to complete it. It is not mine, but I would love to have it! They are free for you to download:

Classic Granny Square different color schemes

and

Different Sized Granny Squares for Afghan

#1 Classic Granny Square

20180307_124923.jpg


5May 2015: I made this You Tube video tutorial for the Classic Granny Square when “Yarnspirations” was collecting Granny Squares from people. There were a lot of free patterns, at the time, that they gave for people to use when making their Granny Squares. I shared some of the gorgeous color schemes in my video. This was also the only video tutorial where I actually ranted a little bit, and rightfully so! I just came to realize that it is an unfortunate part of creating, and it is now a tiny battle that I “rarely” have to fight behind the scenes. I haven’t had the same problem since the episode. Thank goodness because now YouTube has a new copyright detection which is amazing!


There are many different ways to crochet your Granny Squares together, and I may come back to this at some point in the future. If I do, you will see it here and on YouTube. For now, I like to sew my Granny Squares together. If you would like to see how I do it, here is the video tutorial:

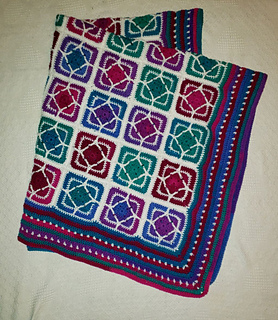
If you love the crochet granny square, then you will have fun with this crochet blanket! Here is the direct link: Crochet Couverture Blanket

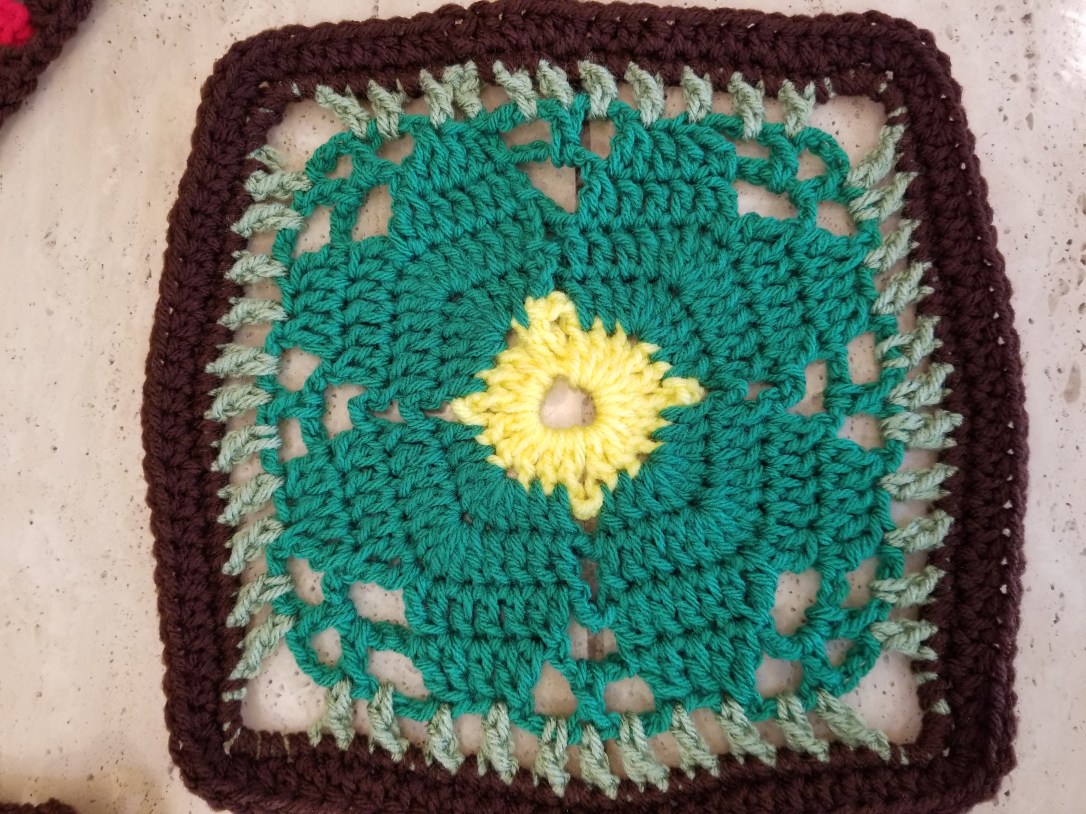
Now, for the second design in my Granny Square Series:

#2 Clover or Heart Granny Square

20180307_124926.jpg


#3 Crochet “Not Centered” Granny Square

Granny Squares Design #3 Not Centered


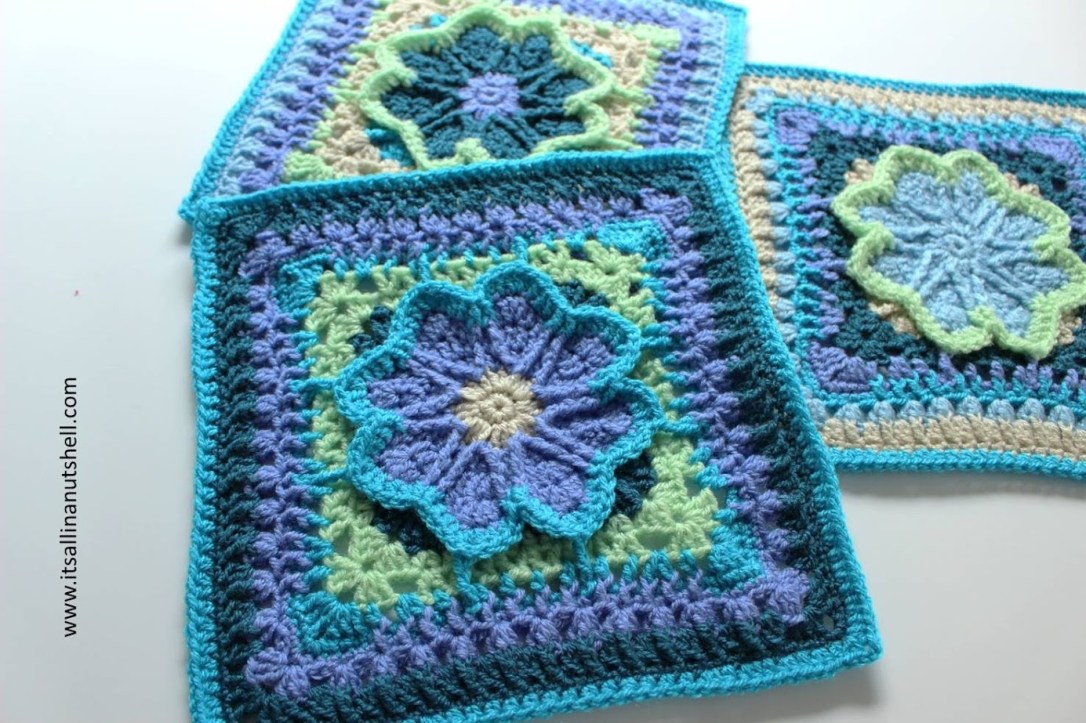
#4 Crochet African Flower Granny Square Design

Granny Square Design #4 African Flower


#5 Crochet Granny Square Daisy Design:

This video tutorial shows how to make the Granny Square design into a Kitchen

Hot Pad/Potholder. I also show a quick and easy way to add beads to the recipe holder that goes with the Hot Pad. You may like the recipe I added towards the end of the video tutorial. I love to add recipes to most of my crochet kitchen YouTube video tutorials. Enjoy!

20180411_155300

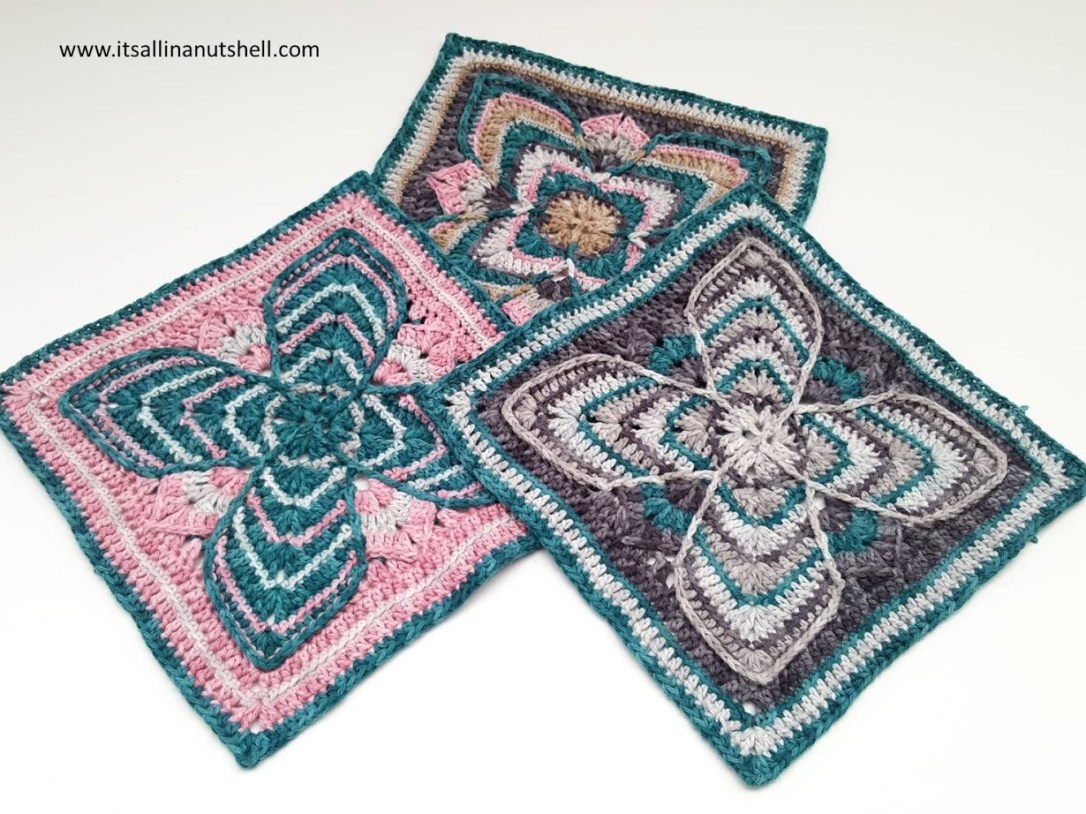
Design #6: Julie’s Crochet Beautiful Butterfly Granny Square for Charity 2018.

Design #7 Crochet Beautiful Flower Granny Square. You can place any crochet flower that you want on this Granny Square. To see more flowers to choose from, here is the direct link: Crochet Flower Design Series Blog Post.

#8 Crochet Vintage Blooming Rose Tea Granny Square Hotpad Potholder with recipes!!! Here is the direct Ravelry link for your free PDF download for the written pattern: Crochet Vintage Blooming Rose Tea Granny Square PDF Written PatternHere is the direct link to the blog post, if you would like the free PDF download for the recipes: Fun, delicious, recipes and more!!!

#9 Bargello Crochet Afghan Block

Bargello-Afghan-block_Large500_ID-1726489.jpg

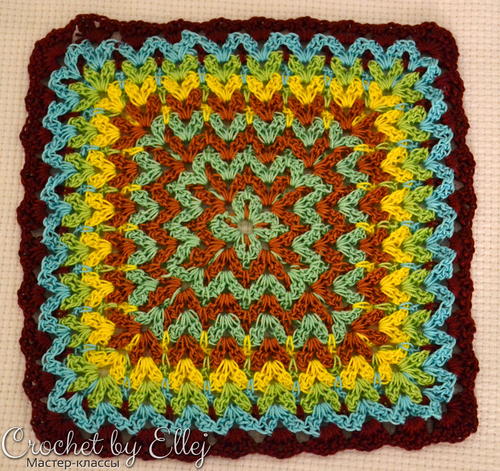
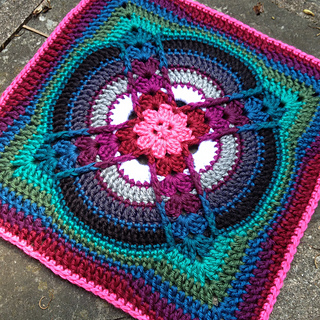
You are going to love the above Crochet Granny Square!!! Crochet by Ellej shows in detail how to use the Bargello Crochet technique to make the gorgeous crochet granny square above. At first glance, it may not seem that difficult to make, but there is a lot more going on with creating this masterpiece! This crochet granny square technique will have all your crochet friends begging you for the crochet pattern, and it is free! This technique is definitely in my favorites files! Her pictorials are awesome! For beginners, I recommend saving this beauty in your favorites files. After you have completed some easier granny squares, I would then attempt this beauty. I tried to go directly to Ellej.org, but my computer wouldn’t allow it. My computer security kept blocking it. “All Free Crochet” has posted the free links and attributed the crochet instructor “By: Elena Kozhukhar.” Elena did an outstanding job showing us how to use the Bargello technique to make this gorgeous crochet granny square. Click the picture above, or click here to go to the free crochet pattern: Bargello Crochet Afghan block

Do you want to learn more about Bargello and what it means? Here is the direct link: Wikipedia article about Bargello.

#10.  Crochet Lady’s Fan Coverlet and Pillow

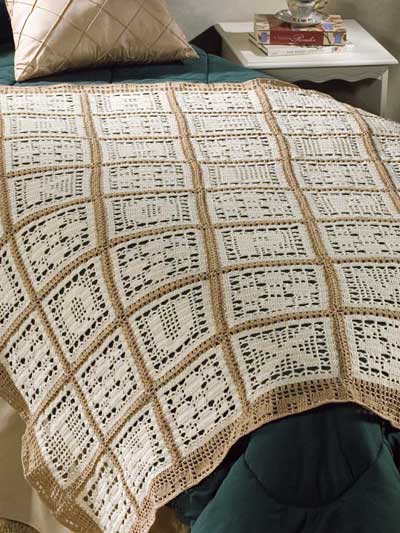
I was in the Facebook Group “Crochet Baby Blankets” when I saw this beautiful crochet pattern. Sineide was gracious enough to share the link with me. Click on the link above or the picture below if you would like to have the free written pattern. You have to scroll down until you see ” Download Lady’s Fan Coverlet and Pillow” in lavender bold lettering. I am not sure how long it will remain free. Last updated 19Aug19

Lady's Fan Coverlet and Pillow

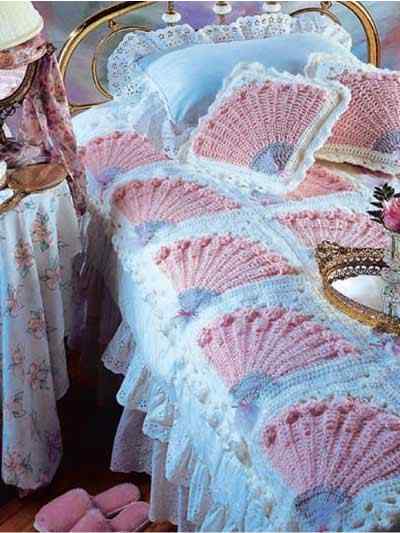
The link works because I have already downloaded my copy for my favorites file. It is one of those beautiful crochet patterns that I will never know when I will get to it but I want the pattern just in case! Enjoy!

I don’t know how long some of the crochet pattern links will remain free. Hopefully, you will be able to save your free copy.

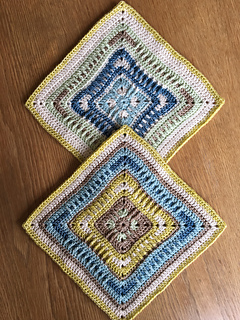
#11. Charlotte’s Dream Pattern Granny Square

Charlottes dream granny square

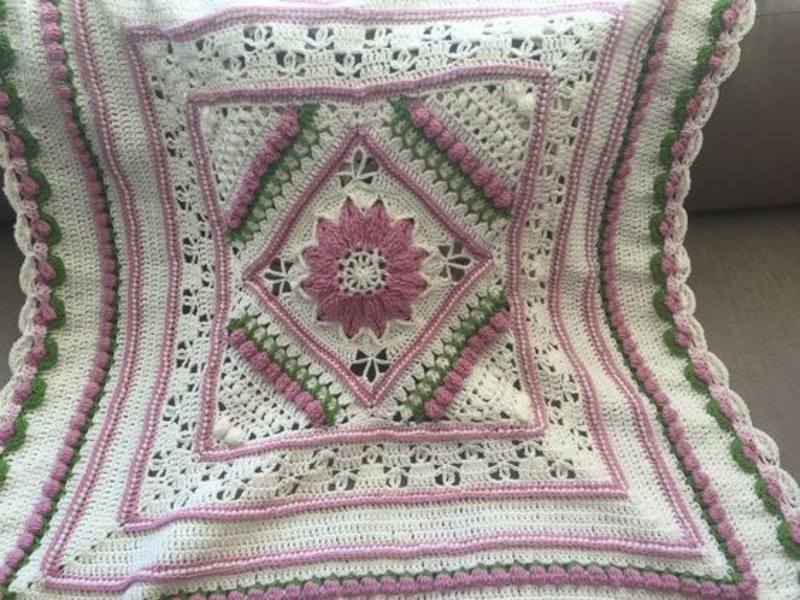
The Charlotte’s Dream Pattern link was shared with me by Facebook Group Crochet and Knitting Free Patterns! It is simply stunning!!!! I was able to access the link easily (No scam phishing cons!) I was able to access all 3 PDF downloads for free! I am not sure how long this gorgeous crochet pattern will be free (Last updated 27Nov18), so make sure to put this stunning beauty in your favorites file for later use. Here is the link trail that I followed:

  1. Facebook Group Crochet and Knitting Free Patterns messaged me the free pattern link.
  2. I clicked on the link and went to “CK Crafts online” web site. I scrolled down to after “Punctuation,” and you will see Charlottes Dream Pattern Links 1, 2, and 3.
  3. I clicked on each of the links and went to “Look at what I made.net.”  If you want the free PDF crochet written pattern, scroll down to the end where you will see “Happy Hooking, xxx Dedri.”  Immediately to the right, you will see “Print Friendly.” Click on that, and you will immediately go to the printable version. In the top left corner, you will see PDF. If the PDF written pattern is still free, you should be able to click on it and save it to your favorites file. Thank you Dedri for an absolutely stunning free crochet pattern!!!

#12 Esme’s Winter Cottage. I am not sure how long this will remain a free PDF download, but I was able to download it for free on 23Dec18. I would recommend saving it in your files, because it is a beauty.

Winter-Cottage-Crochet-Squares

I found the free PDF download in the bottom right hand corner after the blog post. Here is the direct link: Esme’s Winter Cottage Granny SquareEnjoy!

#13 Helen Shrimpton Spiro Star Crochet Granny Square

Spiro_Star2_small2

I found the above free PDF download on Ravelry on 23Dec18. If it is still free, it is also a fun crochet granny square to add to your free PDF files. Here is the direct link: Helen Shrimpton Spiro Star Crochet Granny Square

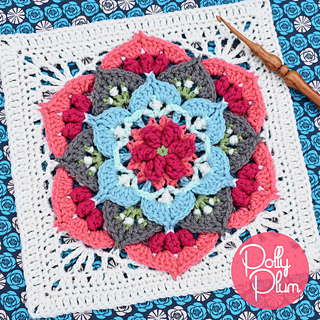
#14. Denna by Polly Plum

071_small2.JPG

Amazing right! Simply gorgeous! I would add this to your future crochet fun files while is remains free! I downloaded this free PDF on 23Dec18. Here is the direct Ravelry link: Denna Polly Plum Granny Square

#15. Le Vesinet Granny Square Designed by Sigrun Hugoey

Vesinet-2.jpg

I was able to download the free PDF file on 23Dec18. Here is the direct Ravelry link:

Le Vesinet Crochet Granny Square

#16. Rachel Block by Melissa Green

rachel-1.jpg

I was able to download my free PDF written pattern on 23Dec18.  Here is the direct Ravelry link: Crochet Rachel Granny Square Block

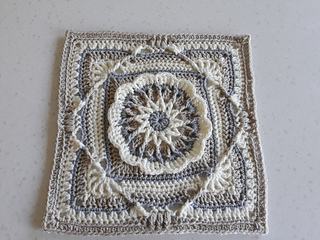
#17. Bavarian Beauty by Heather Gibbs

BB05_Logo_small2.jpg

I was able to download my free PDF written pattern on 23Dec18. Here is the direct Ravelry link: Bavarian Beauty Granny Square

#18. “Fall Blossom” (September 2013sq) Crochet in Common/Designs on a Hook©2013 Multiple Designers: Aurora Suominen, Amy Carlson, Kathy Joelsen

NAS-week9-2

I was able to download my Free PDF written pattern on 23Dec18. Here is the direct Ravelry link: Fall Blossom Crochet Granny Square

#19 Moroccan Window by Heather Gibbs

IMG_1059_small2.JPG

I was able to download my free PDF written pattern on 23Dec18. Here is the direct Ravelry link: Moroccan Window Crochet Granny Square

#20. Lise by Polly Plum

NAS-week12-1.jpg

I was able to download my PDF written pattern for free on 23Dec18. Here is the direct Ravelry link: Lise by Polly Plum

#21. Rosary Hill Afghan CAL from the year 2016 sponsored partly by Red Heart Yarn.

Rosary-Hill-Blanket-CAL-on-Pattern-Paradise.com_.jpg

Click on the picture above, or here, to go directly to the link. There are 3 different crochet granny squares that can be found for this gorgeous afghan.

#22. Magnolia Lace Crochet Granny Square by Kirsten Holloway:

MagnoliaLaceCrochetGrannySquarePattern1_web.jpg

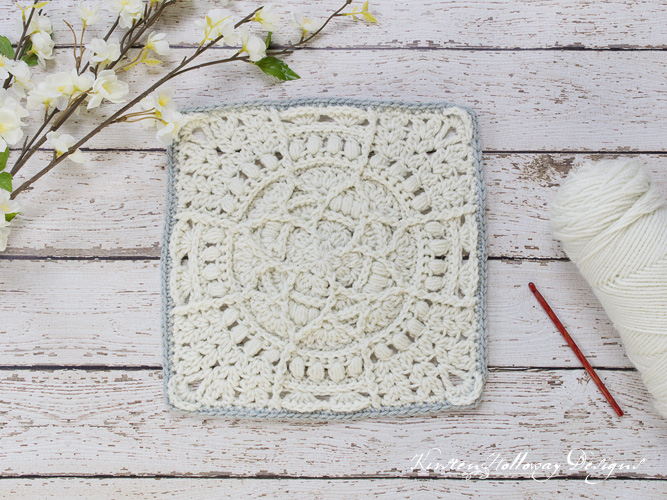
Click on the picture above, or click here, to go directly to the link.

#23. The Great Granny Square Swap that occurred in the year 2010. These wonderful crocheters put together several free crochet granny square designs for everyone to enjoy!  Fast forward to the year 2019 and it is still available for free to everyone! Thankyou very much!  Happy Crocheting!

Picture_2_small2

Click the picture above, or here to go to the direct link for your download. It was available for free on 2Jun2019.

#24 Lisa Hooper at “Cute Crochet Makes” started this free Crochet Unicorn Dreams Blanket CAL. To check it out, here is the direct blog link: Cute Crochet Makes Crochet Unicorn Dreams Granny Square Blanket CAL

274f15_61bcfbc3f2dd4a629508a287e0663f7f_mv2.jpg

#25 I never heard of Schachenmayr until someone mentioned the name in one of my Facebook Crochet Groups. They have a lot of free PDF crochet downloads on their site. They have a filter if you are looking for free PDF crochet written patterns. If you see that it is in a different language, you will notice that there is a button in the lower-left corner of the pattern where you can change the language to English. 🙂

Here is just one of the free PDF written patterns that I downloaded, but there were several others that I loved too:

SCHWEBD-S8649_0.jpg

#26. Eve’s Coverlet 12″ Squares. I first saw this crochet beauty in one of the Crochet Facebook Groups 19Aug19, and I was able to follow the link and download the beautiful PDF pattern for free:

Eves_crochet_Coverlet

27. Floral Bouquet Afghan by Joyce Nordstrom

8800714752030

28. The Last Rose of Summer by Jane Zane.


29. “Alphabetical” Granny Squares. What I love about this free crochet pattern it also gives a few pointers for filet crochet too! For some reason the “J” and the “Y” are missing, but you could easily graph them if you need to. Free as of 30Sept19

alphabetical granny squares.jpg

30. Dragonfly Delight Granny Square

dragonfly delight square.jpg

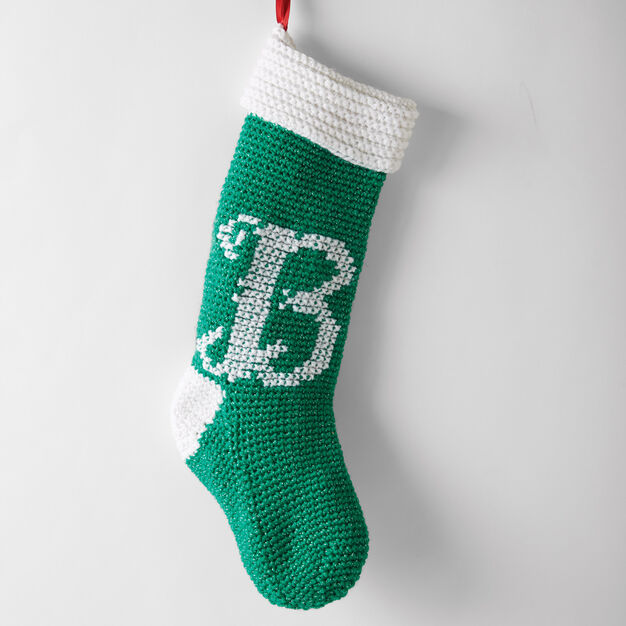
31.  Need help with more ways to graph the alphabet? You will love this link to a free PDF download. It gives all of the graphed letters in this pattern for a monogramed crochet Christmas stocking. Crochet Bernat Monogramed Christmas Stocking.

BRC0517-001467M

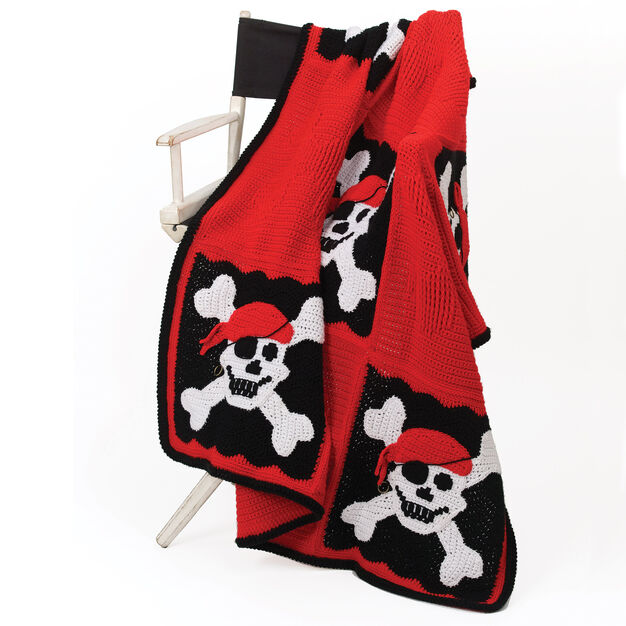
32. Need a good crochet pirate granny square? You are going to love this free PDF download link!! Caron Pirate Throw Granny Square.

CAC0302-000738M.jpg

33. Crochet Aunt Lydias Autumn Tones Tablerunner:

ALC0537-025121M.jpg

34. Crochet Refreshing Throw Granny Squares Design.

RHC0502-023587M.jpg

35. Victorian Lattice Square by Destany Wymore

Destany Wymore Victorian Lattice Square picture.jpg

36.  Crochet Granny Square Hooded Baby Jacket designed by Marion Schneider.

I used a 5.00mm crochet hook and made a crochet sweater sized for a 4 to 5y/o.

This crochet pattern is so quick and easy to make! It is also great for using up excess yarn! I want to follow the original pattern and make a baby-sized one too (Newborn to 3 months)!

If you want the crochet pattern, you can find it in the following leaflet, click here, or the picture below to go directly to the affiliate link.

51-jt3G9AHL.jpg

For my pom-pom tie, I used a ch140 and then I crocheted into the back bump of the chain to make the pom-pom tie/cord.

513HSFm0FPL.jpg

I used dome-shaped flower buttons that I purchased at Joann’s Craft store (Non-affiliate), but you may like the buttons in the picture above. Click the picture above, or here, to go directly to the affiliate link.

37. The “Nomad by Fate” granny square by “Martin up North:”

fullsizerender-15.jpg

38. Crochet Granny Square Imagine Pattern by Polly Plum:  On her blog, towards the bottom, there is a printer-friendly version for free as of 1/9/20.

DSC_0042_small2.jpg


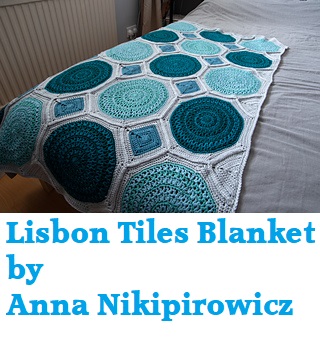
39. I just love Deramores! I signed up to receive their emails and I love a lot of their free crochet patterns that they share! I wanted to add this link for the “Lisbon Tiles Blanket” by Anna Nikipirowicz because it shows how you can take what starts as a circle and turn it into an octagon:

8E02EA80-8E8D-4600-937C-AEA2B8B97543_small2

40. Cheers Granny Square by Polly Plum. She has a free PDF download as of 9Feb20 on her site (Look for printer friendly button at the bottom of her blog post).

DSC_0446_small2

41. Merlin granny square by This little hook of mine:

Merlin by land

She also has several other free PDF downloadable Granny Squares:

FullSizeRender_small2

Definitely check out some of her paid PDF Crochet Granny Square designs too!!

42. Helenmay Crochet Quick Easy Heart Granny Square:

zheart


43. Madux James Afghan Square

20190412_131251_small2

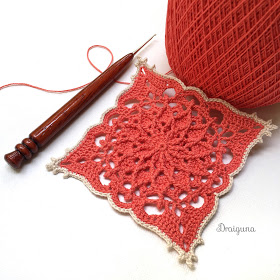
44. Draiguna Wispweave Square:

IMG_0364

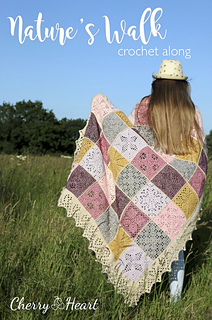
45.Natures Walk CAL by Sandra Paul

NaturesWalkSky_small2

46. Crochet Crocodile Flower PDF Written Pattern by Joyce D. Lewis. This is a paid PDF written pattern.

sunflowerone_small2

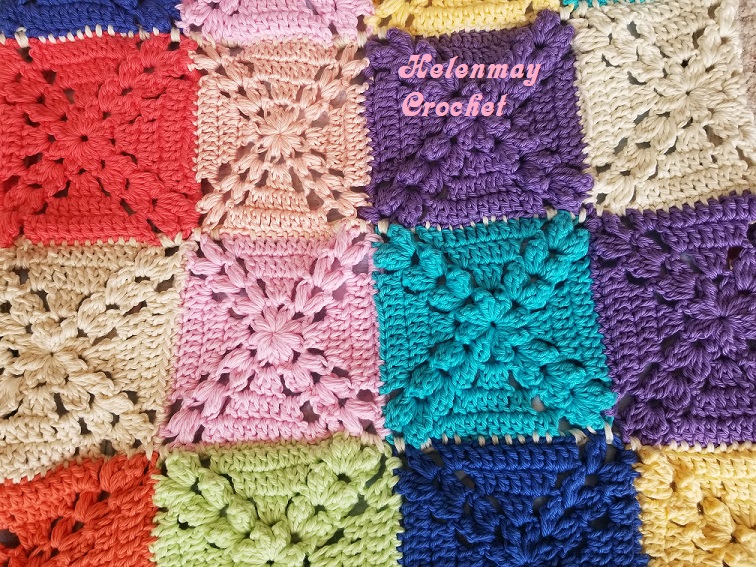
47. Helenmay Crochet “X” marks the spot puff st, bobble st, popcorn st Granny Square

20200602_115121

48. Northern Diamond Square by Torun Johansson.

20190921_090610_small2

If you love all of the great crochet patterns that I share with you, be sure to check out all of the different ways that you can become a

Helenmay Crochet Special Donor Member!!

You can also scroll down to become a subscriber to my blog!

I hope that you enjoy all of the gorgeous designs from so many talented crochet art designers!!! I will continue to add my favorite crochet granny squares to this list. Last updated 3Jun20.

Crochet Heavenly Blessing Matching Set: Scarf, Fingerless or Flip Mittens, Hat, Boot Cuffs, Coin Purse, and Water Bottle Holder


There are affiliate links below. If you are unsure of what affiliated links are, please read my “Disclosures/Disclaimers” and “Privacy Policy,” which can be found at the top of my Homepage.


This slideshow requires JavaScript.

All of the Crochet Heavenly Blessing Set items that you see in the pictures above were included in the set that 1 lucky winner received on 1May18. Congratulations Robyn!!

I decided to go with a different color for my Crochet PDF Written Pattern Heavenly Blessing Set, which includes: Scarf, hat, fingerless or flip mittens, and boot cuffs.

Here are the Direct Ravelry links for the Crochet PDF Written Patterns:

  1. Crochet Heavenly Blessing Scarf PDF Written pattern.
  2. Crochet Heavenly Blessing Hat.
  3. Crochet Heavenly Blessing Fingerless and/or Flip Mittens.
  4. Crochet Heavenly Blessing Boot Cuffs.

This yarn cake is A LOT larger than the yarn I used on the Video tutorial, but it is the same brand. So, I will be letting you know how many cakes of yarn you will need for each part of the set, and the total amount of cakes of yarn for the whole set.  I was able to use one Big Cake for both the Scarf and Flip Mittens!!!!

20180306_154603

On Amazon, I tried to pick yarn choices for prices that I would pay for a similar yarn. Watch the prices, because sometimes they change depending on when I posted on my blog. You can change the search for different colors in the same yarn. The prices may vary depending on the yarn color. If you like the yarn that I used for the written pattern, I found it on Amazon, but it is a different color (Peppercream). It is still beautiful, click here to see it.  The color above is Plum Pudding, which is the color that I used. My favorite colored scarf was the one that I used in my video tutorial. I was able to find the color (buttercream) on Amazon, but I didn’t like the price. If you still want to check out the buttercream on Amazon, click here.  Here is another beautiful color (Red Velvet), with the same brand, click here.


The gorgeous crochet throw in the above-left picture was the free crochet pattern that came with one of my plum pudding colored yarns. You could make the same crochet throw, or you could use my Heavenly Blessing pattern for a similar throw. The above right picture was a free knit pattern that came with one of my plum pudding colored yarns too. For those of you that don’t knit, like me, you could use the knitting patterns for inspiration or different color schemes. I keep the free patterns that I get off of my yarn in a folder.


Heavenly Blessing Scarf Step-by-Step YouTube video tutorial:


Crochet Heavenly Blessing Scarf:  Make the tassels by using a device that doesn’t waste any yarn! Perfect Tassels every time! You can also use the Tassel maker to make a separate tassel that matches your scarf! Use the Tassel on a key chain, hang on your purse or bag, etc…


Do you need a yarn bowl?

Check out these great yarn bowls that you may like!

Absolutely gorgeous yarn bowl! Click here.

Stunning yarn bowl! Click here.

If you liked the designer scissors that I used in the Tassel video tutorial, you may like these similar ones that come with embroidery scissors too! click here.

For a Tassel cap like mine in the video, click here.

For the large Tassel maker, click here.

For the small Tassel maker, click here.

For the non-messy, strong glue that I used on my Tassel maker, click here.


You may like this Free PDF Crochet Mitten Sizing Chart to make sure that your crochet flip mittens are the right size:

 Crochet Mitten Sizing Chart

Crochet Heavenly Blessing Matching Fingerless/Flip Mittens Step-by-Step YouTube video Tutorial:


You may like this Free PDF Crochet Hat Sizing Chart to make sure that your crochet hats are the right size:

Crochet Hat sizing chart


This slideshow requires JavaScript.

If you like the yarn winder and yarn bowl that I used in the pictures above, you can go to my beginner crocheter link to find all of my favorite crochet materials.


This slideshow requires JavaScript.

The alpaca plum colored chunky yarn crochet Heavenly Blessing Child’s Hat that I made, used up all of the yarn to make it. There was nothing left after finishing up with the pom pom.  If you like it, I used my 5.75mm crochet hook to make it. You can count the cross st and trinity st rounds in the picture above. I had to alter the size because I only had 1 skein of yarn in that particular color and yarn style. The width is 9 inches (18-19 head circumference, using the hat sizing chart) and the length is 7 to 7.5  inches.

Crochet Heavenly Blessing Matching Hat Step-by-Step YouTube Video Tutorial:


Here is a Free PDF download for sizing your crochet boot cuffs:

Crochet and Knit Boot Cuff Sizing Chart

Helenmay Crochet YouTube Channel:  http://tinyurl.com/helenmaycrochet 


1 Caron Big Cake Yarn can make a scarf and set of flip mittens, with a small amount of yarn left over. You will need a 2nd Caron Big Cake Yarn for the hat, boot cuffs, coin purse, and water bottle holder.  You will still have yarn left over from the 2nd yarn cake.


Crochet Heavenly Blessing Matching Boot Cuffs Step-by-Step YouTube Video Tutorial:


I like to use my matching yarn to sew the purse frame to my crochet work. However, this can be difficult on the curved portion of the purse frame. An easier alternative would be to use a matching yarn thread instead. Another recommendation would be to center the two large holes on each side, after securing the purse frame in the front middle portion. The large holes tend to rub on the crochet work (as you are sewing the purse frame to the crochet work and may fray your yarn.

Crochet Heavenly Blessing, matching Coin Purse. There is no Crochet Written pattern for the coin purse at this time. Here is the step-by-step YouTube video tutorial showing you how I made it:


The Crochet Heavenly Blessing Matching Water Bottle Holder doesn’t have a written pattern at this time, but here is the step-by-step YouTube video tutorial:

Crochet Amigurumi Rabbit Fun up to 2018

17757440_593414390847546_6356722146375446737_n

Affiliated links are below. If you are unsure of what affiliate links are, please read my “Disclosures/Disclaimers” and “Privacy Policy.”

This slideshow requires JavaScript.

I have compiled pictures (above) that include all of my Crochet Rabbit designs up to 3 Mar 2018. I have everything from extra small, small, and large crochet bunny rabbits.  Some of them have malleable ears! I show how I made them in some of my video tutorials.  If you would like to go to my Helenmay Crochet YouTube Channel now, to browse through my step-by-step YouTube video tutorials, click here.

My personal favorite is my Crochet Large Adorable Bunny Rabbit.


If you like the black safety eyes that I used, click the affiliate link here to purchase your own.

If you want to try some different colored safety eyes, click the link here, or the picture:

41kPm9CzciL

You can also go to my “Ordering Safety Eyes and Noses” button on my homepage, and you will see a variety of different fun safety eyes that you can use.

My Crochet Fiesta Ripple Dress fits my crochet large adorable bunny rabbit, and you can have a lot of fun making the dress with different colors!

For my Crochet Large Adorable Bunny Rabbit Pant Overalls:

Here is my quick, easy, beginner amigurumi bunny rabbit:

If you like the malleable ears, I show you how I made them in this video tutorial:


This link will provide you with your choice of size and color for your craft wire: Different choices for color and size craft wire

The craft wire that I used in the video tutorial works great, but here is the craft wire that I like to use now. Click here to go see it.  Be aware that the wire gauge gets larger/heavier as the gauge gets smaller. If you prefer a smaller/lighter gauge wire, here is the direct link: smaller gauge craft wire

Here is a special saving on a bulk buy, 3 pack on a different smaller gauge size: craft wire bulk buy 3 pack

I am currently testing the larger/heavier craft wire on 2 different crochet rabbits for the written pattern that will go here.

Here is my Quick, Easy, Beginner Cute Little Bunny Rabbit with its little crochet carrot:

Helenmay Crochet You Tube Channel
http://tinyurl.com/helenmaycrochet
Crochet Cute Little Bunny Rabbit Written Pattern

Pattern by Helen Brady

Copying and distribution prohibited. For personal use only.

PDF version is also available for free for “Subscribers” to my blog. Go to the “Contact” button on my HOME page and let me know that you would like my Crochet Cute Little Bunny Rabbit PDF Written Pattern.  It contains pictures as well.

ABBREVIATIONS:
sc= single crochet                                                                   inc = increase
ch= chain stitch                                                                      rnd(s)= round (s)
FO= finish off or fasten off                                                  Sl st= slip stitch
mm= millimeter (s)                                                               hdc= half double crochet
Sc2 tog= single crochet 2 stitches together                       DC= double crochet

(Sc2tog: Insert crochet hook into first stitch, yarn over and bring up loop,
insert hook into second stitch, yarn over and bring up loop, 3 loops on
your hook, yarn over and bring yarn through all 3 loops.)

(Rabbits are approximately 5 inches tall)

GENERAL MATERIALS LIST: You can mix and match yarn colors for different looks
– Super soft 4-ply premium worsted weight yarn. I used Lions Brand Pound of
Love yarn: one color for the inner ear, one for the main color of the bunny, and
one for the nose and mouth.
– 100% cotton yarn for the carrot. I used “I love this cotton: super soft, super
savings.” I used an orange color and green color.
– 2 animal safety eyes (12mm or 9mm). I like them both, but prefer the 12mm.
– Size “F” crochet hook (4.00mm)
– 1 tapestry needle
– 1 pair of scissors

Head:

– Using the magic circle technique, make 6 sc into the magic circle.
– 2 sc into every stitch around (total of 12)
***Alternative to the magic circle:
-ch2
-work all of your stitches in the second ch from the hook. Do not count the 1st ch
you skipped as a stitch.
-Increase rounds:

-*1sc in 1 stitch and 2sc in second stitch. Repeat from * (18 total stitches).
-*1sc in 2 stitches and 2sc in third stitch. Repeat from * (24 total stitches).
-Make 1sc in every stitch for 2 rounds (24 total stitches each round)
-*1sc in 3 stitches and 2sc in fourth stitch. Repeat from * (30 total stitches).
-Make 1sc in every stitch for 2 rounds (30 total stitches each round)

-*1sc in 2 stitches and 2sc in third stitch. Repeat from * (40 total stitches).
-Make 1sc in every stitch for 2 rounds (40 total stitches each round)
-Decrease rounds:
-*1sc into 2 stitches then Sc2tog. Repeat from * (30 total stitches).
-*1sc into 3 stitches then Sc2tog. Repeat from * (24 total stitches).
-*1sc into 2 stitches then Sc2tog. Repeat from * (18 total stitches).
Place the eyes and sew on the nose:

-Go to the opposite side of the head (where you want to make your rabbit
face), count down 8 rows from the magic circle on top of the rabbit head, place
your eyes with approximately 4-5 stitches between each eye. Once you are sure
that you have the eyes where you want them, place the safety backing on.
-Use your tapestry needle to sew on the nose and mouth. Center the top
of the nose between the eyes, go two rows down to form a triangle. Fill in the
triangle with your yarn. Go one row down from the bottom point of the triangle to
start the mouth. Go one stitch over and one row down for each side of the mouth.

-Stuff the head with craft, or pillow, stuffing.
-Decrease Rounds:
-* 1sc into one stitch and then Sc2tog. Repeat from *. (11 total stitches).
– Sc2tog and slip stitch the head closed. FO and bury your loose yarn end.
Body:
– Using the magic circle technique, make 6 sc into the magic circle.
– 2 sc into every stitch around (total of 12).
Increase rounds:
-*1sc in 1 stitch and 2sc in second stitch. Repeat from * (18 total stitches).
-*1sc in 2 stitches and 2sc in third stitch. Repeat from * (24 total stitches).
-Make 1sc in every stitch for 6 rounds (24 total stitches each round).
-Stuff the body as you close.
Decrease rounds:
-*1sc into 2 stitches then Sc2tog. Repeat from * (18 total stitches).
-*1sc into one stitch and then Sc2tog. Repeat from *.
– Sc2tog and slip stitch the head closed. FO and bury your loose yarn end.

Sew the head to the body with your tapestry needle

Ears: 2 inner ear color and 2 outer ear color.  Both inner ears and outer ears are made the same way:  Make 2 inner ears one color and 2 outer ears the same color as your bunny rabbit.

-Make a ch4.
-1sc in 2nd chain from hook. 1 sc in each of the next 2 stitches
(4 total stitches).
-ch1, turn, 1sc in same stitch. 1sc in each of the next 2 stitches. 2sc in the
last stitch (6 total stitches).
-ch1, turn, 1sc in next 4 stitches. 2sc in the last stitch (7 total stitches).
-*ch1, turn, 1sc in next 6 stitches. Repeat from * 5 times (7 total stitches).
-Turn, 1sc in next 6 stitches (6 total stitches).
-Turn, 1sc in next 5 stitches (5 total stitches).
-Turn, 1sc in next 4 stitches (4 total stitches).
-Turn, 1sc in next 3 stitches (3 total stitches).
-Turn, 1sc in next 2 stitches (2 total stitches).
-Turn, 1sc in next stitch. FO.
-Place the inner ear on top of the outer ear. With the inner ear facing up, make
1sc in every stitch along the side of the inner and outer ear.
-Make 3 sc in the same stitch at the top point of the ear.
-1sc in every stitch on the other side of the ear, across the bottom of the ear, and
back to the beginning stitch ( tuck all of the loose yarn ends into the inside of the
ear before reaching the beginning stitch).
-slip stitch into the beginning stitch. FO. Leave a long loose yarn end for sewing
the ear onto the rabbit.

Sew the rabbit ears onto the rabbit with your tapestry needle.

Arms: Make 2.

– Using the magic circle technique, make 6 sc into the magic circle.
– 2 sc into every stitch around (total of 12)
-Make 1sc in every stitch for 2 rounds (12 total stitches each round).
Decrease rounds:
-*1sc into 3 stitches then Sc2tog. Repeat from * Make 1sc in the 2
remaining stitches (10 total stitches).
-*1sc into 2 stitches then Sc2tog. Repeat from * Make 1sc in the 2
remaining stitches (8 total stitches).
-*1sc into 1 stitch then Sc2tog. Repeat from * Make 1sc in the 2 remaining
stitches (6 total stitches).
– Slip stitch the arm closed. FO and make your loose yarn end long
enough for sewing the arm onto the rabbit.

Feet and tail: Make 2 for the feet and 1 for the tail
(you can change colors for the tail if you want).
– Using the magic circle technique, make 6 sc into the magic circle.
– 2 sc into every stitch around (total of 12)
-Make 1sc in every stitch for 3 rounds (12 total stitches each round).
– *Sc2tog. Repeat from * for one round (6 total stitches) and then slip stitch
closed. FO and make your loose yarn end long enough for sewing the feet and
tail onto your rabbit.

Sew on the hands and carrot before sewing on the feet.
-The feet will be flattened into a circle before sewing them on the rabbit.
-The tail will be kept open before sewing it onto your rabbit.

Carrot:
– Using the magic circle technique, make 6 sc into the magic circle.
– 2 sc into every stitch around (total of 12)
-Make 1sc in every stitch for 2 rounds (12 total stitches each round).
-Stuff the carrot as you close it.
Decrease rounds:
-*1sc into 3 stitches then Sc2tog. Repeat from * Make 1sc in the 2
remaining stitches (10 total stitches).
-*1sc into 2 stitches then Sc2tog. Repeat from * Make 1sc in the 2
remaining stitches (8 total stitches).
-*1sc into 1 stitch then Sc2tog. Repeat from * Make 1sc in the 2 remaining
stitches (6 total stitches).
– Slip stitch the carrot closed. FO and bury your loose yarn end.

Carrot stems: Make 2.

-Make a ch4.
-1sc in second chain from the hook.
-1 hdc in next stitch.
-1sc in next stitch. Slip stitch in the same stitch. FO and make the
loose yarn end long enough for sewing the carrot stem on the carrot
(tie a knot with the initial short loose yarn end and the long yarn end
that you finished off with).
-Sew the carrot stems onto the carrot and bury your loose yarn ends.
-Sew the rabbit arms on in a position where your rabbit can hold the
carrot and then sew the carrot in place.
-Sew the rabbit feet on. Flatten the feet like a disc as you sew them
on.
-Sew the rabbit tail on and make sure that the tail is not flattened as
you sew (sew it along the base only).

Sew on the hands and carrot before sewing on the feet.

Flatten the feet into a disc shape before sewing them on.

Sew the tail on, making sure to sew at the base of the tail only.

Copyright 2016 by Helen Brady. All rights reserved. This pattern may not be used for purposes of mass production. The owner of the pattern may, however, sell the items he or she makes from it.
To see more designs by Helen Brady,  you can also visit:
Helenmay Crochet You Tube Channel
Ravelry

Be sure to go to my Helenmay Crochet You Tube Channel and check out my different Crochet Baskets to go with your Crochet Bunny! I hope that you will share a picture of your finished crochet work with me on Facebook! I would love to see them! I plan on featuring people’s crochet work on my Home page in the future, depending on how many pictures I receive. I have already received some crochet pictures for March, so look for my featured, crochet work by someone else,  at the end of March 2018.

Crochet Waves of Love Baby Set: Baby Hat, Baby Booties, Baby Blanket, and Matching Security Blanket,

20180220_095051.jpg

ANY DONATIONS TO MY SITE ARE GREATLY APPRECIATED!! THANK YOU VERY MUCH!

20180301_080028


IF YOU DON’T SPEAK ENGLISH, I HAVE GOOGLE TRANSLATE AVAILABLE ON MY BLOG. SCROLL TO THE VERY BOTTOM OF THIS PAGE TO FIND THE FEATURE, OR YOU CAN GO TO MY HOME PAGE AND SCROLL TO THE BOTTOM TO FIND IT.

Information about “The Crochet Waves of Love Baby Blanket” can be found after the written pattern for my “Crochet Waves of Love Baby Booties.”

Copyright 2018 by Helen Brady. All rights reserved. This pattern may not be used for purposes of mass production. The owner of the pattern may, however, sell the items he or she makes from it.

This slideshow requires JavaScript.

Would you like a crochet anchor applique on your Crochet Waves of Love Set? You can find the crochet anchor applique at the end of my Crochet Waves of Love Baby Booties video tutorial.

The following are direct links for some of the other crochet items in the Crochet Waves of Love set:

Free Crochet Waves of Love Baby Hat YouTube Video Tutorial:

My Crochet Waves of Love Baby Hat paid written pattern is available for purchase on:

Amazon Kindle Direct link, click here.

The Crochet Waves of Love Baby Booties video tutorial:


The Crochet Written pattern, for my Crochet Waves of Love Baby Booties: It is because of the donors to my blog, that I am going to provide the Crochet Waves of Love Baby Booties free written pattern here on my blog as promised for a limited time:

page 1

ABBREVIATIONS:

Sc= single crochet                                              inc= increase

Ch= chain stitch                                                             rnd(s)= round (s)

FO= finish off or fasten off                                             Sl st= slip stitch

Right side= the side that will be showing                    mm= millimeter (s)

Wrong side= the side that will not be showing.           cm= centimeter (s)

dc= double crochet                                                    hdc= half double crochet

st= stitch (# total)= stitch count                             tr= treble crochet

Hdc2tog= Yarn Over (YO). Insert your crochet hook into the next stitch. Pull the yarn through the stitch on your crochet hook. You should now have three loops on your crochet hook. YO Insert your crochet hook into the next stitch. Pull the yarn through the stitch on your crochet hook. You should now have five loops on your crochet hook. YO, pull the yarn through all five loops on your crochet hook.

Treble Crochet (tr)= YO twice. Insert your crochet hook into the next st. Pull the yarn through the st on your crochet hook. You should now have 4 loops on your crochet hook. YO, and pull the yarn through 2 of the loops on your crochet hook. You should now have 3 loops on your crochet hook. YO, and pull the yarn through 2 loops on your crochet hook. You should now have 2 loops remaining on your crochet hook. YO, and pull the yarn through the 2 remaining loops on your crochet hook.

page 2

GENERAL MATERIALS LIST: You can mix and match yarn colors for different looks. Just be aware that different yarn choices can change the look and size of your crochet baby bootie when finished. Also, changing your crochet hook size, will also affect the size of your crochet baby bootie and/or anchor.

-Crochet Hook Size 3.75mm.

-Tapestry Needle

-Scissors.

-Stitch markers (If you don’t have stitch markers, you can use your extra loose yarn ends. I used my excess loose yarn ends on video tutorial

**My yarn recommendations (On You Tube video tutorial, I used some different yarn choices. So, you can see the broad range of yarn choices that you could have when making your own unique crochet baby booties.):

-1 skein Big Twist Rainbow Classic 100% Acrylic Yarn color Serene Blue. You will have plenty of yarn left over.

-1 skein Big Twist Rainbow Classic 100% Acrylic Yarn color Royal Blue. You will have plenty of yarn left over.

ANCHOR GENERAL MATERIALS:

-3.50mm crochet hook

-1 skein Aunt Lydia’s Crochet Thread Classic 10, 100% Mercerized Cotton, Color Peacock. -1 skein Patons Beehive Baby Sport, Light #3 yarn, Color Baby Grey Marl

If you liked the yarn that I used for my crochet anchor, click here, to the affiliated link.

Here is the yarn that I used for the Crochet Anchor Chain, click here, to the affiliated link.

page 3

On YouTube video tutorial, I show how to crochet 2 different sizes: up to 12 months and 3-6 months. I will also show both sizes on this written pattern. I will start with the smaller crochet baby bootie, and show the differences with the larger bootie.

SMALLER SOLE: I started with Royal Blue Colored Yarn.

-Ch14. Starting ch. (***Larger Sole was a ch20 Starting chain)

-Make 3dc into the 4th ch from the hook, then 1dc into the next 2 stitches, 1hdc into the next st., 1dc into the next 3 stitches, 1 tr into the next 3 stitches, (***Larger sole is 1tr in next 6 st), 9tr into the last st. Working in rounds, turn your work to make crochet stitches on the opposite side of your starting chain. Make 1tr into the next 3 stitches (***Larger sole is 1tr in next 6 st), then 1dc into the next 3 stitches, 1hdc into the next st, and 1 dc into the next 2 st, then 3dc into the last st, which is the same st your first 3dc were made. Slst into the top st of the first ch3 that you made. (34 total) (***Larger sole 46 total)

***This is the time that you can measure the sole of your baby shoe, and determine if it is the correct size, before you continue on. Use your free downloadable PDF baby bootie sizing chart to compare it to. When you look at my Larger Sole differences, you will see where I made changes in the size of my initial ch, and in the crochet stitches to alter the size. That way you will see how you can alter the stitches in the sole to get different sole sizes for your baby bootie.

-Using your stitch markers: Place a stitch marker in the following stitches: 5,6,13,14,17,18,29,30, and 33. (***Larger sole stitch markers: 7,9,22,25,26,40,42,47)

-Place your yarn marker before starting your next round (To help keep track of the rounds and stitch count). Make 1sc into the next st and every st around, except for the stitches that contain a stitch marker. Place 2sc into the same st that contains a st marker. Slst into the top st of the first ch3 that you made. Double check your stitch count before going on further. (43 total) (***Larger sole 54 total)

-Move your yarn marker up. Make 1sc into every st around for 3 rounds. (43 total) (***Larger sole is same st count as previous round, unless otherwise specified).

Decrease rounds– Your decrease stitches should be centered around the front of the bootie.

-Make 1sc into 9 stitches, then make 10 hdc2tog stitches. Make 1sc into each of the remaining stitches. (33 total) (***Larger sole: Make 1sc in 17 st, then 12 hdc2tog total st count 42)

-Make 1sc into 9 stitches, then make 6 hdc2tog stitches. Make 1sc into each of the remaining stitches. (27 total) (***Larger sole: Make 1sc in 13st then 8 hdc2tog total st count 34)

-Make 1sc into 9 stitches, then make 3 hdc2tog stitches. Make 1sc into each of the remaining stitches. (24 total) (***Larger sole: Make 1sc into 12 st then 5 hdc2tog total st count 29)

page 5

Join your new color, and cut your previous colored yarn. Bury your loose yarn ends as you crochet. I used Serene Blue.

For the next round, we are going to start our first crochet wave stitch design with our new color. Wave Stitch Rounds:

-Make 2sc into the next st, then make 1sc into the next 3 st, then make 1dc into the next 5 st. *Make 1sc into the next 5 stitches, then make 1dc into the next 5 stitches. Repeat from * for one round. (25 total) (***Large Sole 30 total) **You should have ended this round with 1sc in 5 stitches. (***Large Sole will end the round with 1dc in 5 stitches). The wave st requires a multiple of 5 or 10. The small sole has a multiple of 5, which is “25” and the large sole has a multiple of 10, which is “30.” You have just completed the bottom portion of the wave st.

-*Make 1sc into the next 5 stitches (Each sc st should be in the previous rows sc st), then make 1dc into the next 5 stitches (Each dc st should be in the previous rows dc st). Slst into the next st. (25 total) **You have just completed the top portion of the wave st. You should have completed 2.5 waves in the round. (***Larger sole has 3 total waves in the round.) Join your new color, and cut your previous colored yarn. Bury your loose yarn ends as you crochet. I used Royal Blue. For the next round, we are going to start our second crochet wave stitch design with our new color.

Wave Stitch Rounds: We are going to alternate our wave pattern. Since we started with sc for our last wave pattern, we will start with a dc for our second wave pattern.

-Ch3 (This ch3 should be directly over the previous rows first sc), make 1dc into the next 4 st. *Make 1sc into the next 5 st, and then make 1dc into the next 5 st. Repeat from * Slst into the top st of the first ch3 that you made (25 total) **Each dc will line up with the previous rows sc, and each sc will line up with the previous rows sc. You have just completed the bottom portion of the wave st.

-Ch3, make 1dc into the next 4st. *Make 1sc into the next 5 st, and then make 1dc into the next 5st. Repeat from* Slst into the top st of the first ch3 that you made. (25 total) **Each dc will line up with the previous rows dc, and each sc will line up with the previous rows sc. You have just completed the top portion of the wave st. You should have completed 2.5 waves in the round. (***Large sole 3 waves in the round).

Join your new color, and cut your previous colored yarn. Bury your loose yarn ends as you crochet. I used Serene Blue. -Make 1sc in every st around. FO. (25 total)

page 6

ANCHOR: Peacock colored yarn. The Anchor Chain yarn will also work as the main color for the anchor. Both yarns work with a 3.5mm crochet hook. See the picture at the end of this pattern.

-Ch 16

-Make 1hdc into the 3rd ch from the hook, and make 1hdc in every st back across. FO. Bring enough yarn through to help sew the bottom of the anchor in place later. (15 total) -From the side that you FO, and the right side facing you, count inwards 10 stitches, and join your same colored yarn. Starting with next st over, Sc2tog twice. ***You are in the center of the bottom of the anchor.

-*Ch1, turn your work, make 1sc into the next st. Repeat from * 5 times. (2 total) ***This is the center of the anchor.

-Make a chain of 3, turn your work, then sc into the 2nd ch from the hook, make 1sc into the next st, then that will bring you back to the center of the anchor (small handle, right top part of anchor is complete). Make 1sc into the next 2 st. (Center of the anchor). Make a chain of 3, turn your work, then sc into the 2nd ch from the hook, make 1sc into the next st, then that will bring you back to the center of the anchor (small handle, left top part of anchor is complete). Slst into the next st. (Center of the anchor).

-*Ch1, turn your work, make 1sc into the next st over. Repeat from * 1 more time. (2 total) ***Top center of anchor, above small handles.

-Make a chain of 8, turn your work, Slst into the next st. ***You formed the loop at the top of the anchor.

-Turn your work, and make 8 sc into the center of the loop at the top of the anchor. Slst into the next st. FO. Bring enough yarn through to sew the anchor appliqué in place. ***Thickened the loop at the top of the anchor.

ANCHOR CHAIN: I used Baby Grey Marl colored yarn

-Ch20. FO. Bring enough yarn through to sew the anchor chain on the anchor.

-Tie the smaller loose yarn end around the loop of the anchor. With the right side of the anchor facing you, the knot will be to the right.

-Bring the anchor chain from the back side of the anchor loop, to the front side of the anchor loop.

-Bring the anchor chain across the front of the anchor, to the right, go behind the top right small handle of the anchor.

-Bring the anchor chain from the back side to the front side, by going under the top left small handle of the anchor.

-Bring the anchor chain across the front of the anchor, and down to the bottom of the anchor, bringing the anchor chain towards the back side of the anchor. Sew it in place on the bottom of the anchor.

Page 7

Your anchor appliqué is now ready to be sewn on your Crochet Wave of Love Baby Booties. Line up the anchor on the front of your baby bootie. I started sewing the loop of the anchor first, sewed down the center of the anchor, lined up the bottom of the anchor (make sure it isn’t crooked), sewed the bottom of the anchor in place, and then sewed the anchor chain in place. There is a separate video tutorial for the Crochet Waves of Love Baby Hat, Security Blanket, and Baby Blanket.

Click here for the Free PDF Crochet  Baby Shoe Sizing Chart

If you liked the yarn that I used for my crochet anchor, click here, to the affiliated link.

Here is the yarn that I used for the Crochet Anchor Chain, click here, to the affiliated link.

The yarns look good in reverse too, as shown in the pictures below. I used the same size crochet hook for both yarn choices for the anchor.

The Crochet Waves of Love Security Blanket, and matching Baby Blanket, is on YouTube video tutorial only. I DO NOT have the Crochet Written Pattern available as of 24Sept18

Crochet Waves of Love Baby Blanket and matching Security Blanket:


Crochet Amigurumi Pug Dog

20160912_140340.jpg

Affiliated links are below. If you don’t know what affiliate links are, please read my “Disclosures/Disclaimers” and “Privacy Policy.”

20181119_151338.jpg

When I first saw the book above, I had to have it for my grandchildren! I love books that teach moral lessons to children. If you would like to purchase the book, click the picture above, or here, to go directly to the affiliate link.

One of my most popular crochet written dog patterns is my adorable pug dog. I have Over 30 crochet dogs!!!!! to choose from!!!

This slideshow requires JavaScript.

If you would like to go to my Ravelry Link for the paid crochet PDF written pattern for the crochet pug dog only, click here.

You can see pictures of different crochet pug dog’s that other people have made since I first published my pattern. Go to my “People Who Have Shared Their Crochet Work With Me” Blog post.

For one of my Crochet Pug Dog, I used a Star Wars Pet Outfit that I purchased, and it will fit a real medium-sized dog. Another cute pet outfit is a tuxedo.

You won’t believe the unbelievable deal that Amazon has for this gorgeous fair isle knitted pet outfit! To check it out, click on the affiliated link here.

This knitted Christmas Reindeer Fair Isle is also adorable! Click on the affiliate link here.

Wait until you see this super affordable and cute shark pet outfit! Click on the affiliate link here.

Last, but not least, you have to see the tuxedo pet outfit. Click on the affiliate link here.

Please share your finished crochet work with me! I plan on sharing your crochet work in my “People Who Have Shared Their Crochet Work With Me” Blog post.  I will choose one picture to feature on my Home Page. I am going to start at the beginning of April 2018. You can share any of the crochet work that you have made using my YouTube Video Tutorials.

Please Subscribe to my Blog. You will find where to subscribe at the bottom of the page. You will receive emails for any new blog posts.

Happy Crocheting!!

Here is my free step-by-step You Tube video tutorial: