
There are affiliate links below, if you are unsure of what affiliate links are please go to “Disclosures/Disclaimers” and “Privacy Policy” at the top of my HOME page. Affiliate links basically allow me to receive a very small referral fee, but only if you make purchases. Just because you go to the link doesn’t mean that I will receive a referral fee. Thank you so much for considering my affiliate links; I really appreciate it!
I had a family member request that I create a crochet panda bear for them as a gift for a high school graduate. This is how “Bai Yun (White Cloud)” the crochet graduate Panda was born! I named her after the real panda that lived at the San Diego Zoo before going home to China.
For those that want to name their own crochet Panda and print a diploma, here is the FREE PDF download:
I get asked a lot about what amount I would price my crochet work for. Someone had asked about my crochet graduation panda bear, so I made a product pricing worksheet (You can find your free blank downloadable product pricing worksheet at the top of my blog’s HOME page). Here is my filled in product pricing worksheet for my crochet large graduation panda bear:
Crochet Panda Bear Product Pricing Sheet
There will be 5 parts to the video tutorials:
Part 1 to Part 3 YouTube video tutorials will show how to make your crochet large amigurumi Panda Bear.
Part 4 YouTube video tutorial will show how to crochet the graduation cap and gown.
Part 5 YouTube video tutorial will show how to make the crochet bamboo leaves.
Part 1 of 5 YouTube video tutorial:
Part 2 of 5 YouTube video tutorial:
Part 3 of 5 YouTube video tutorial:
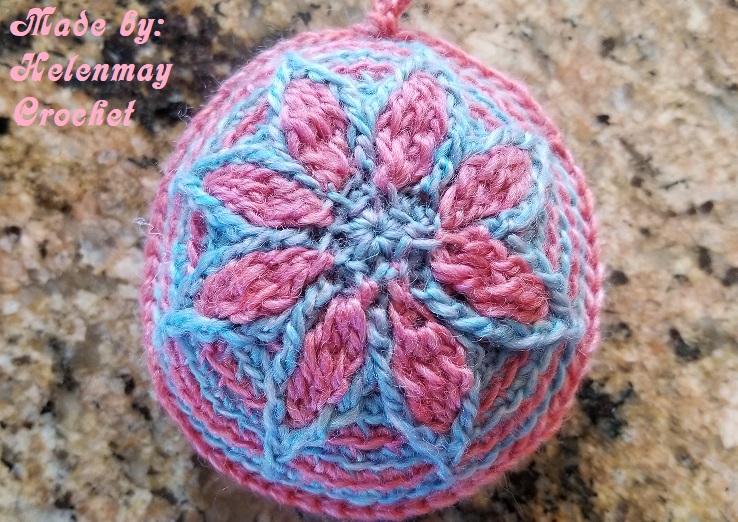
If you are looking for the optional crochet dimple cover pattern that I used, I used the Lilla Bjorn Rozeta CAL Bonus pattern:
If you like the necklace that my crochet panda wore, you may like some of these optional choices (affiliate links):

Click the picture above, or here, to go directly to the affiliate link. Prime eligible!
If you want .925 sterling silver, and/or different sayings to choose from, and Prime eligible then you can click here, or the picture below to go directly to the affiliate link:

The part 4 YouTube video tutorial for the crochet graduation cap and gown:
Crochet Panda Part 5 of 5 Bamboo Leaves DIY Video tutorial:
Nicole Dickel contacted me and asked if there was any way that I could design a crochet graduation gown that was not like a dress. I told her that I would. I am going to provide the free written pattern here as a BONUS:
Crochet quick, easy, beginner BONUS graduation gown for your Helenmay Crochet Amigurumi Large Panda
I also made a YouTube video tutorial for the Bonus graduation gown. You can follow along with the BONUS YouTube video tutorial:
Here is the written pattern, if you would like to follow along on my blog instead. If you scroll down towards the bottom of this blog post, you will find google translate too!
Materials that I used:
- Any medium 4 sport black yarn would work.
- 6.00mm crochet hook
- 1 dark-colored button (The button should fit through the space between the dc stitches and be large enough to hold the front panels of the gown together.)
- Sewing needle and thread to sew the button in place
- 1 tapestry or darning needle
- 1 pair of scissors
Abbreviations:
ch= chain
dc= double crochet
hdc=hdc
hdc2tog= half double crochet 2 stitches together: YO, insert the hook into the desired st and bring up a loop. You should have 3 loops on your hook. YO, insert the hook into the next st and bring up a loop. You should have 5 loops on your crochet hook. YO and pull the yarn through all 5 loops on your crochet hook.
First, make the 2 front panels: Use your black colored yarn and make 2.

The left and right front panels are both made the same way.
Starting chain= ch17
Row 1= Make 1dc into the 4th ch from the hook, 1dc into the next st, and 1dc in every st back across. (15 total st.)
Row2 to Row8= *Ch3, turn your work, make 1dc into the next st and 1dc into every st back across. Repeat from * 6 more times. (15 total st. Measures 5” x 5”)
Row 9= Ch14, turn your work, make 1dc into the 4th ch from the hook, make 1dc into the next st and 1dc in every st back across.
Row 10 to Row12= *Ch3, turn your work, make 1dc into the next st and 1dc into every st back across. Repeat from * 2 more times. (27 total st; 9” width and 3” height).
Row 13 = Ch3, turn your work, make 1dc into the next st and 1dc into every st until you have 5 unworked stitches remaining in the row. Leave these last 5 stitches unworked to form the neck. Remember that the neck portion is opposite the sleeve portion of the front panel. Use the picture above as a guide. (22 total st)
Row 14 = Ch3, turn your work, make 1dc into the next st and 1dc into every st back across. FO. Leave a long loose yarn end for sewing. (22 total st)
Making the back panel: Use your black colored yarn. Make 1.
Starting chain: ch53
Row 1: Make 1dc into the 4th ch from the hook and 1dc into each of the stitches back across. (51 total st)
Row 2 to Row 8: *Ch3, turn your work, make 1dc into the next st and 1dc into every st back across. Repeat from * 6 more times. (51 total; 17″ x 5″)
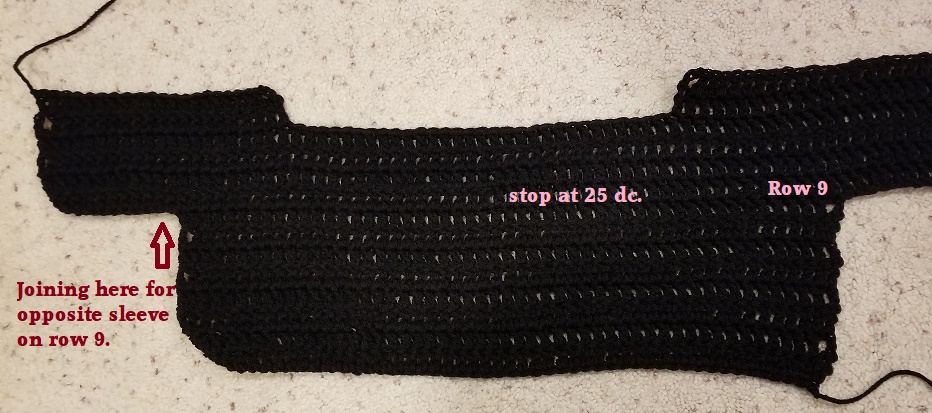
Row 9: Ch14 (For the sleeve), turn your work, make 1dc into the 4th ch from the hook, and 1dc into the next st and 1dc into the next 37 stitches (This should bring you to the middle of the back). FO. After you FO on the one side, join your black colored yarn on the opposite side, and then ch14 (We are now making the opposite sleeve), turn your work, make 1dc into the 4th ch from the hook, and 1dc into the next st and 1dc in every st until you meet up with where you finished off with the opposite sleeve. Slst into the top st of the opposite dc. FO. (75 total)
Row 10 to Row 12: Join your black colored yarn on one side of your back panel, ch 3, make 1dc into the next st and 1dc into every st back across. *Ch3, turn your work, make 1dc into the next st and 1dc in every st back across. Repeat from * 1 more time. DO NOT FO. We will continue crocheting and make the left neck portion. (75 total st)

Line up your left front panel and your right front panel on top of the back panel. Place your st markers so you know where to stop while forming the back neck portion. Place the 2 st markers in the 23rd st from the left and in the 23rd st from the right. Use the picture above as a guide.
Continuing to crochet where we left off:
-Ch3, turn your work, make 1dc into the next st and 1dc into every st until you reach a st marker. Do not dc into the st with the st marker. Ch3, turn your work, make 1dc into the next st and 1dc into every st back across. FO. Repeat the same thing on the opposite side of the back panel. Use the picture above as a guide. (22 total st)
SEWING THE BACK PANEL AND THE FRONT PANELS TOGETHER:
Place the left and right front panels on top of the back panel. Make sure that the neck portions line up and that the “right sides” are facing each other. Sew the top portions of each sleeve, then sew the bottom portions of each sleeve, and lastly, sew both sides together.
Turn your work inside out.
Now, you will notice that the neck portion is really loose on the crochet large panda. I will show you how to crochet the collar of the graduation gown now, which will eliminate the gap created by the neck at this time.
COLLAR PORTION: Use your black colored yarn. The “right side” of the graduation gown is facing you.
Row 1: Join your yarn at the left neck portion to start crocheting the collar. Ch2, make 1hdc into every st until you reach the back of the gown( 14 hdc). Across the back of the gown, hdc2tog until you reach the next neck portion on the opposite side (16 hdc2tog). Make 1hdc in every st until you reach the end of the neck portion on the opposite side (14hdc). Remember, we are only crocheting the collar portion)
Row 2: Ch2, turn your work, make 1hdc in every st until you reach the back portion of the gown. Across the back of the gown, *make 1hdc into 3 st and then hdc2tog. Repeat from * all the way across the back of the gown until you reach the next neck portion on the opposite side. Make 1hdc in every st until you reach the end of the neck portion on the opposite side. FO.
Bury any loose yarn ends.
Place the gown on your crochet amigurumi panda. The “right side” should be facing you. Sew the button on the right side, just below the collar portion. Use the space between the dc, just below the collar portion on the left side, as a button hole.
Here is your FREE downloadable Crochet quick, easy, beginner BONUS graduation gown PDF written pattern by
Helen Brady:
Copyright 2020 by Helen Brady. All Rights Reserved. This pattern may not be used for purposes of mass production.
Helenmay Crochet YouTube Channel Direct link

This is Great, can’t wait to start.
Sent from my iPad
>
LikeLiked by 1 person
would also like a written pattern. Is a written pattern coming soon?
Sent from Outlook
________________________________
LikeLike
Hi Dittobabes! I am sorry but I don’t have a written pattern for my crochet large panda at this time. I only have the step-by-step FREE YouTube video tutorial at this time. I don’t have plans to write the pattern in the immediate future.
LikeLike
How large is this Panda?
LikeLike
17 inches tall
LikeLike