I hope that everyone stays safe during these difficult times associated with Covid-19. If you haven’t already, try to spend some time away from the news. Also, try and set a little time for daily exercise, while adhering to your doctor’s orders regarding exercise, and the self-distancing rules. Lots of prayers and blessings for all of you! Stay safe! 27Mar20.
There are affiliate links below, if you are unsure of what affiliate links are please go to “Disclosures/Disclaimers” and “Privacy Policy” at the top of my HOME page. Affiliate links basically allow me to receive a very small referral fee, butonly if you make purchases. Just because you go to the link doesn’t mean that I will receive a referral fee. Thank you so much for considering my affiliate links; I really appreciate it!
I have a wonderful surprise for people following along with my Crochet Along (CAL)!!!
One FREE random surprise package that includes a Furl Tunisian Crochet Hook!! Go to Contests and Giveaways for the year 2020 for details! I am not sponsored, or affiliated with Furls.
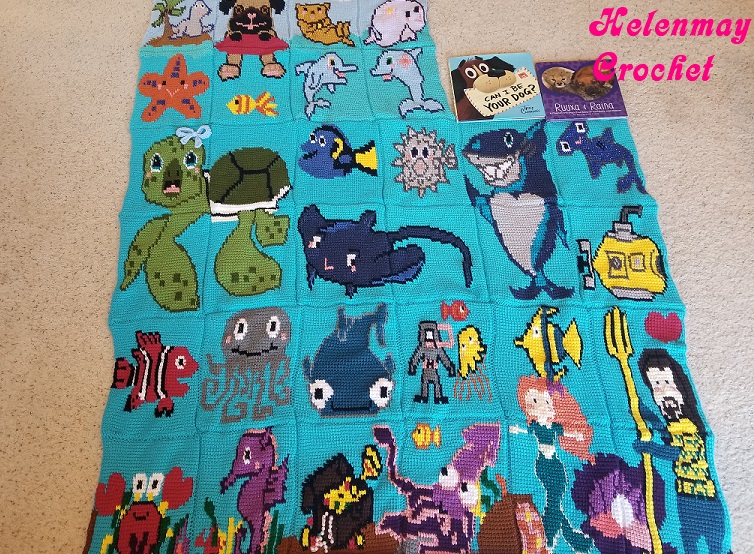
All of the Tunisian Under The Sea Mystery CAL 2020 graph blocks are finished!!! I will have BONUS graphs coming. I plan on making pillows out of the bonus graphs. Please follow my blog for updates! Now, I have a YouTube video tutorial that will show you how to attach a fleece backing for your finished Tunisian Crochet Graphghan:
The size of the fleece that I attached to my Graphghan was 76″ x 59.5″
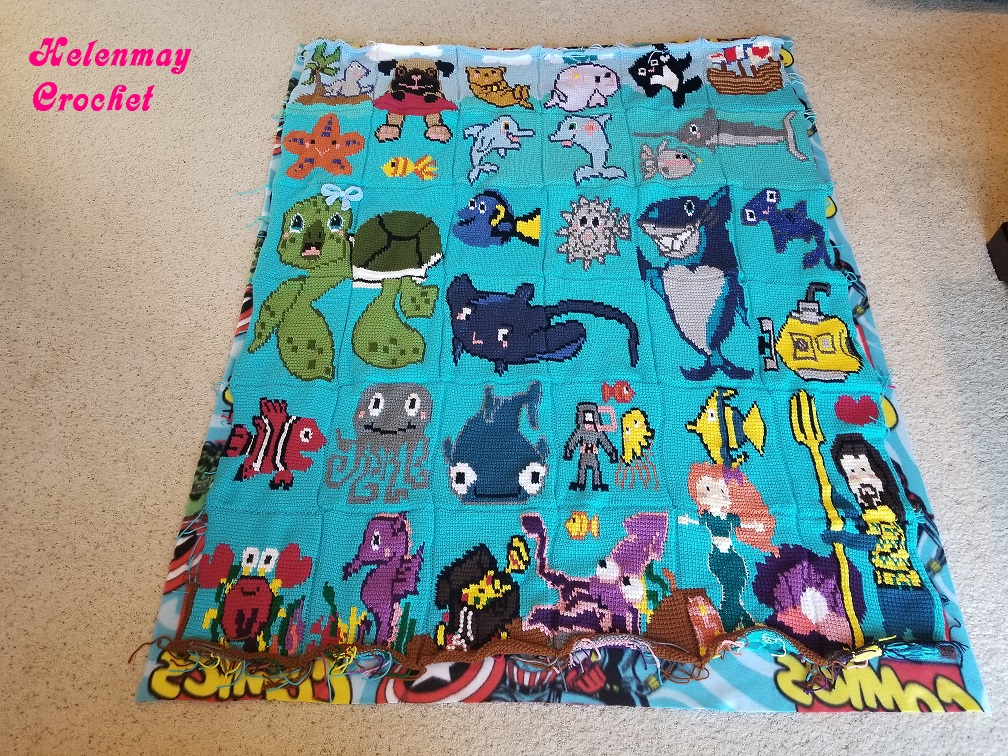
Here is a picture of what the Tunisian Graphghan looks like from the back:
Here is the YouTube video tutorial for my crochet clamshell border:
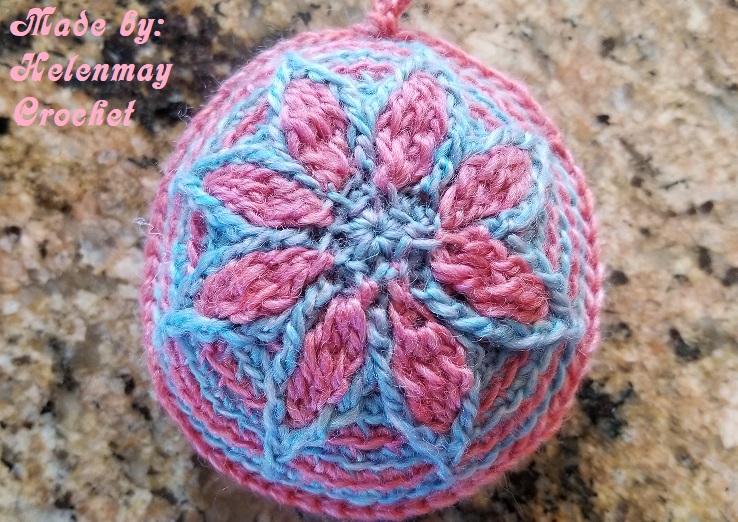
Here is the first of 2 bonus graphs for a small pillow:
I am just making a Tunisian Crochet backing for the pillow that is the same glittery metallic blue that I used for the front. I am going to make the pillow backing the same way that I did for my Tunisian Crochet Cardinal Pillow. You can use a plain Tunisian Crochet pillow backing using the Tss (Tunisian Simple Stitch), which is the same st that you used for the front of the pillow, or you can use a fabric backing.
Here is the free PDF Bonus Blue Fish Graph #2 of 2:
I hope that everyone stays safe during these difficult times associated with Covid-19. If you haven’t already, try to spend some time away from the news. Also, try and set a little time for daily exercise, while adhering to your doctor’s orders regarding exercise, and the self-distancing rules. Lots of prayers and blessings for all of you! Stay safe! 27Mar20.
There are affiliate links below, if you are unsure of what affiliate links are please go to “Disclosures/Disclaimers” and “Privacy Policy” at the top of my HOME page. Affiliate links basically allow me to receive a very small referral fee, butonly if you make purchases. Just because you go to the link doesn’t mean that I will receive a referral fee. Thank you so much for considering my affiliate links; I really appreciate it!
I have a wonderful surprise for people following along with my Crochet Along (CAL)!!!
One FREE random surprise package that includes a Furl Tunisian Crochet Hook!! Go to Contests and Giveaways for the year 2020 for details! I am not sponsored, or affiliated with Furls.
We only have 4 blocks left until I start making a YouTube video tutorial showing how to attach the fleece backing. Some people have opted for Tunisian Crocheting their own backing, which works too. After I attach the fleece backing to mine, I will crochet the clamshell border. I already have a YouTube video tutorial that shows how to crochet a clamshell border.
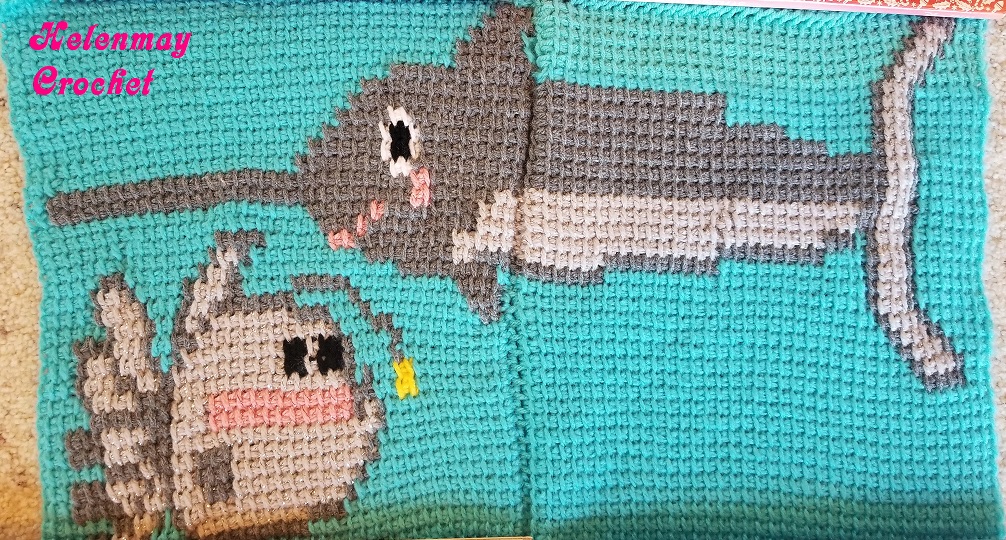
For the first 2 blocks, I made the Angler Fish (Also known as the Lantern Fish) and a Swordfish. Why did I include the not so pleasant looking Angler Fish? The Angler Fish is so bizarre and seems like something out of science fiction movies!! Did you know that only the female has the fishing pole like protrusion? I chose the swordfish because it is so distinctive and it is one of the fastest fish in the ocean!
Tunisian Crochet Under The Sea Mystery CAL 2020 Lantern Fish and Swordfish head block# 33:
I was over halfway finished with my next ship block when I realized that I was using the ocean blue color instead of my sky blue color! I had to do a lot of “Frogging.” (Undoing my beautiful Tunisian Crochet work. Huge sigh). My ship is turning out good though. I put red, white, and blue for the sails, but you can change the colors for your own unique ships if you want to.
Tunisian Crochet Under The Sea Mystery CAL Ship block #36:
Some people like to use Tunisian Crochet for the backing, and it looks beautiful too! I am going to attach an inexpensive fleece backing to mine.
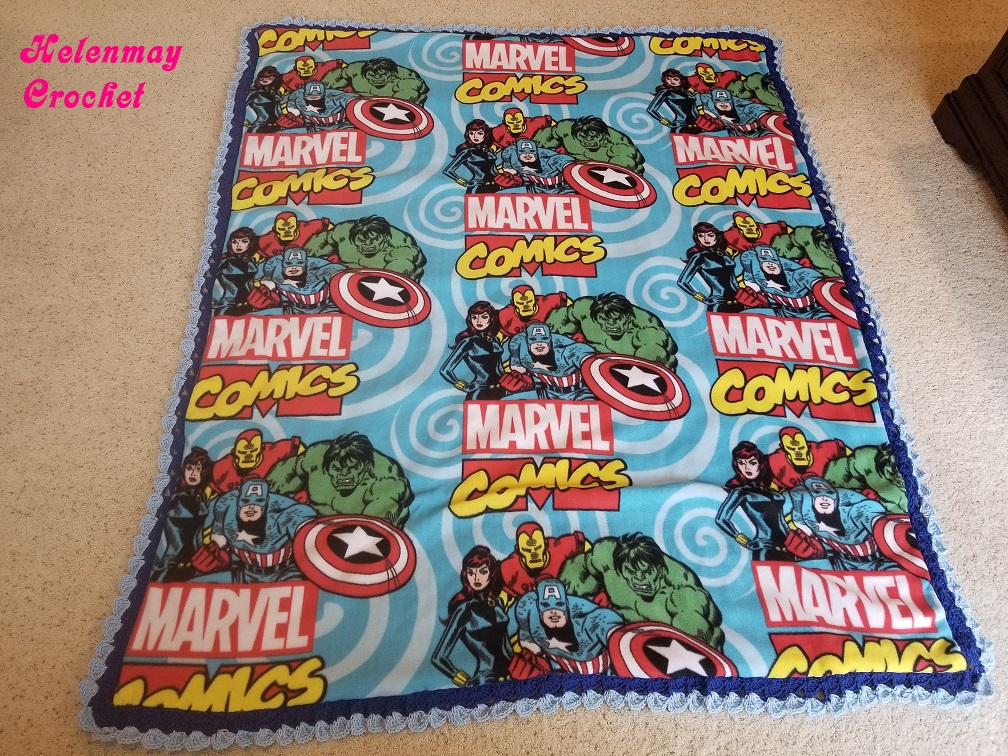
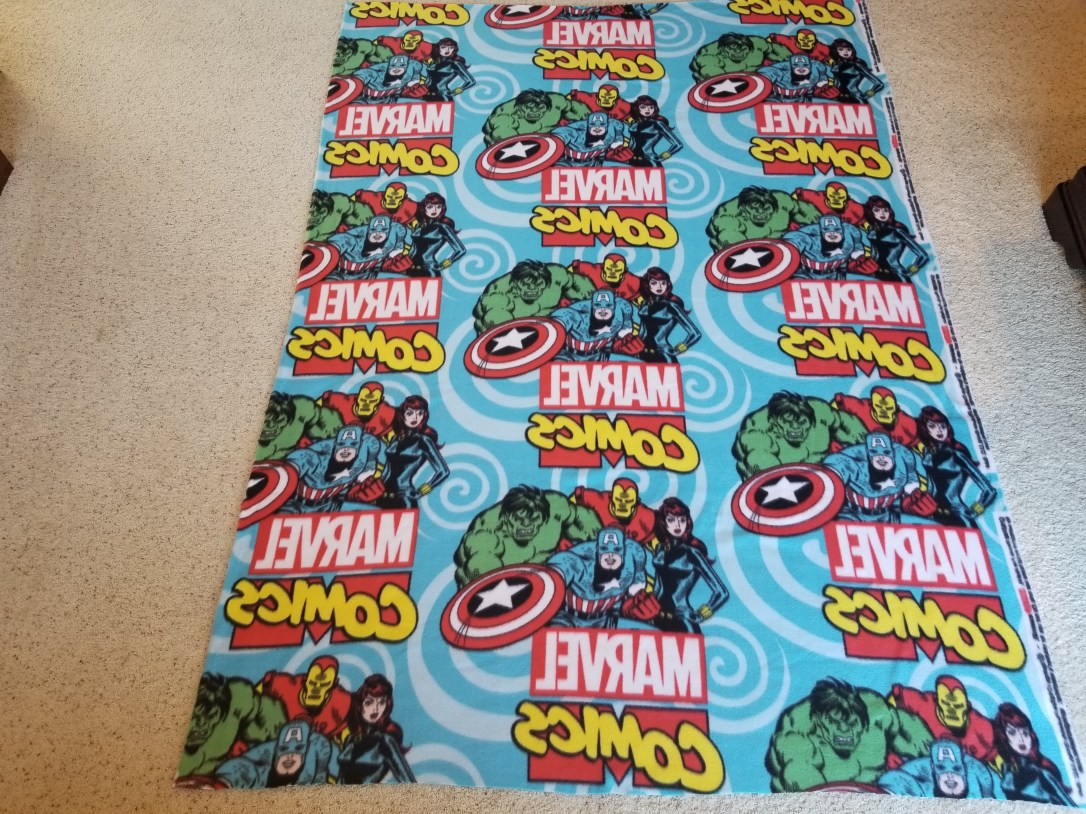
First, I chose the fleece that I wanted to use.
If you chose a patterned fleece, you will want to make sure that you pay attention to the pattern and/or words. My fleece says “Marvel Comics,” so I want to make sure that it faces the right direction or faces the “right side” of the blanket. I trimmed my blanket down to the size 59.5″ x 76″. Make sure that you leave approximately 1 inch around the complete border of the blanket because you need room for the embroidery stitch.
There will be a YouTube video tutorial coming soon showing how to make the embroidery stitch.
Brenda B. asked if I could create blocks with the name of the CAL and the date and year. I will work on these blocks as bonus graphs. You can switch out the bonus graphs or create one more row at the top/bottom of the Graphghan. You could also use the bonus graphs for pillows. 🙂
There are affiliate links below, if you are unsure of what affiliate links are please go to “Disclosures/Disclaimers” and “Privacy Policy” at the top of my HOME page. Affiliate links basically allow me to receive a very small referral fee, butonly if you make purchases. Just because you go to the link doesn’t mean that I will receive a referral fee. Thank you so much for considering my affiliate links; I really appreciate it!
I have a wonderful surprise for people following along with my Crochet Along (CAL)!!!
One FREE random surprise package that includes a Furl Tunisian Crochet Hook!! Go to Contests and Giveaways for the year 2020 for details! I am not sponsored, or affiliated with Furls.
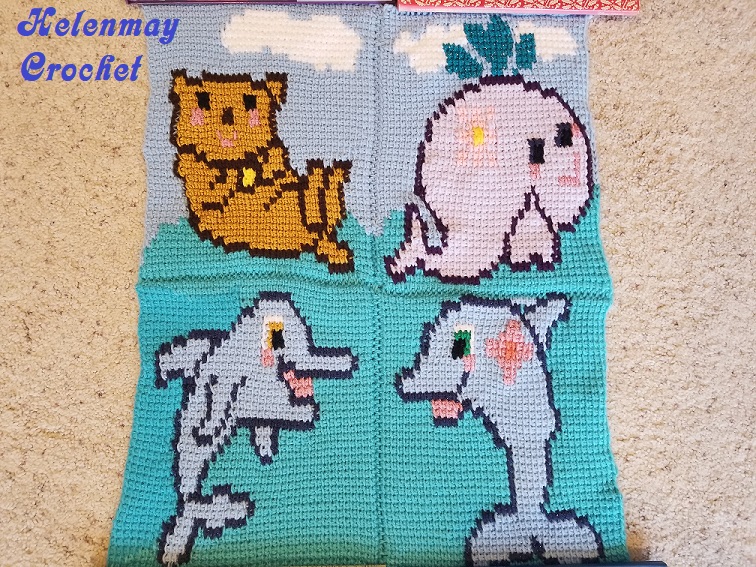
We only have 8 blocks left!!! I hope that you are having as much fun with this Tunisian Crochet Graphghan project as I am! At the top of my blog’s HOME page you will find a contact link. You can send me a picture of your finished Tunisian Crochet Under The Sea Blocks if you want to. I would love to see them!
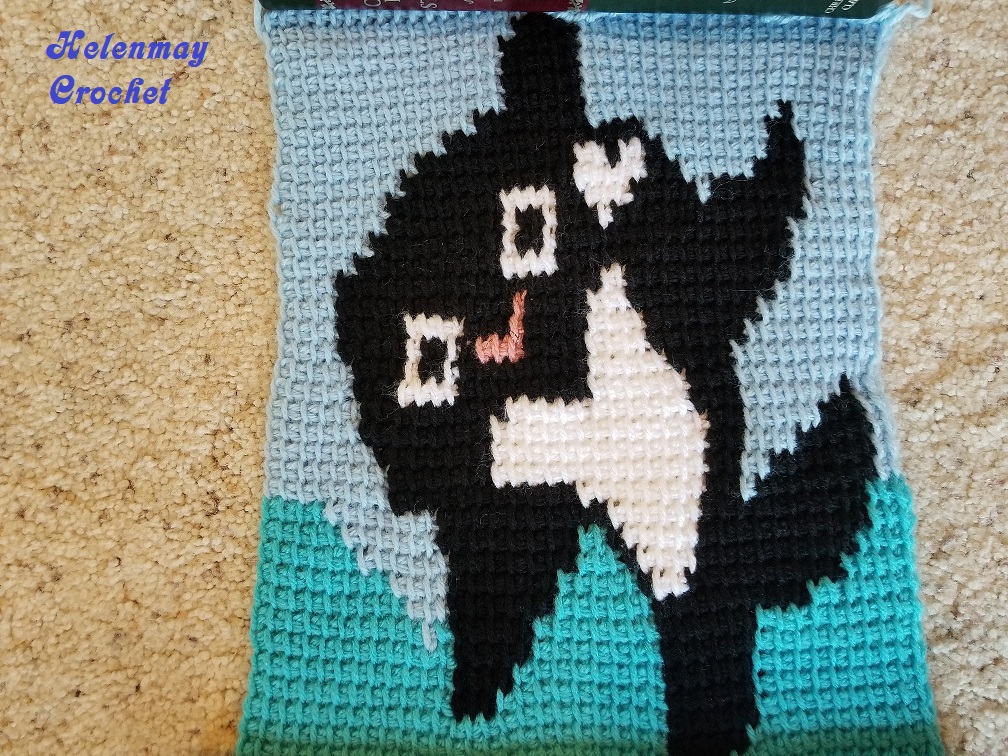
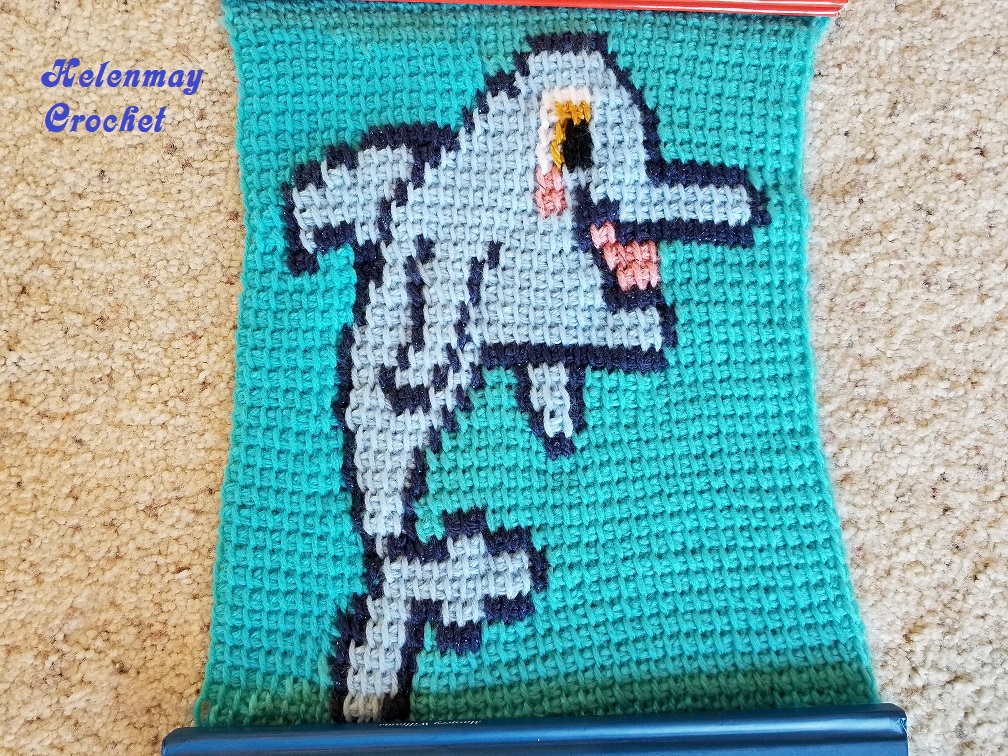
Tunisian Crochet Under The Sea Mystery CAL 2020 Boy Dolphin Block# 29:
Here is a BONUS graph that I think you will love! I made the graph 46 x 46 instead of my regular 40 x 40 graph. I used my new Furls Tunisian Crochet hook to make it. The Furls Tunisian Crochet hook is approximately 2″ longer than my regular Tunisian crochet hook.
Marlene contacted me via my blog and said: “Hi HelenMay, I just wanted to know should I be doing my stitches a bit tighter. Also, I was wondering if I could get your koala bear Tunisian and is your bunny pillow Tunisian a free download? Thank you, Marlene”
I replied: ” Hi Marlene, When I looked at your pictures, it looked like your stitches weren’t too loose. You want to try and maintain the distance between stitches the same as if you had no color changes. Sometimes with the color changes, it is really easy to make the stitches too tight. I try not to pull the stitches too tight with the color changes. Yarn choices will also make a difference. If your yarn is thinner, it might look like you have a gap, so sometimes I will pull the yarn a little tighter, but this will create a slight curve; I usually try to avoid this. Most of the time the curve hugs the picture, like with my clownfish, and I think that it adds character to the finished block. You will get used to your favorite yarn styles for Tunisian Crochet, and you will get used to a comfortable stitch distance for the look that you like. If you don’t like the stitches too tight, you can avoid stretching the yarn across the back of your work and just add a new yarn strand each time. I added some close-ups of my Tunisian stitches for you as picture attachments. The bunny graph is a free download on my blog: https://helenmaycrochet.com/2020/03/21/tunisian-crochet-under-the-sea-mystery-cal-part-8/. I have attached your free koala bear graph to this email. :)”
There are affiliate links below, if you are unsure of what affiliate links are please go to “Disclosures/Disclaimers” and “Privacy Policy” at the top of my HOME page. Affiliate links basically allow me to receive a very small referral fee, butonly if you make purchases. Just because you go to the link doesn’t mean that I will receive a referral fee. Thank you so much for considering my affiliate links; I really appreciate it!
I had a family member request that I create a crochet panda bear for them as a gift for a high school graduate. This is how “Bai Yun (White Cloud)” the crochet graduate Panda was born! I named her after the real panda that lived at the San Diego Zoo before going home to China.
For those that want to name their own crochet Panda and print a diploma, here is the FREE PDF download:
I get asked a lot about what amount I would price my crochet work for. Someone had asked about my crochet graduation panda bear, so I made a product pricing worksheet (You can find your free blank downloadable product pricing worksheet at the top of my blog’s HOME page). Here is my filled in product pricing worksheet for my crochet large graduation panda bear:
If you like the necklace that my crochet panda wore, you may like some of these optional choices (affiliate links):
Click the picture above, or here, to go directly to the affiliate link. Prime eligible!
If you want .925 sterling silver, and/or different sayings to choose from, and Prime eligible then you can click here, or the picture below to go directly to the affiliate link:
The part 4 YouTube video tutorial for the crochet graduation cap and gown:
Crochet Panda Part 5 of 5 Bamboo Leaves DIY Video tutorial:
Nicole Dickel contacted me and asked if there was any way that I could design a crochet graduation gown that was not like a dress. I told her that I would. I am going to provide the free written pattern here as a BONUS:
Crochet quick, easy, beginner BONUS graduation gown for your Helenmay Crochet Amigurumi Large Panda
I also made a YouTube video tutorial for the Bonus graduation gown. You can follow along with the BONUS YouTube video tutorial:
Here is the written pattern, if you would like to follow along on my blog instead. If you scroll down towards the bottom of this blog post, you will find google translate too!
Materials that I used:
Any medium 4 sport black yarn would work.
6.00mm crochet hook
1 dark-colored button (The button should fit through the space between the dc stitches and be large enough to hold the front panels of the gown together.)
Sewing needle and thread to sew the button in place
1 tapestry or darning needle
1 pair of scissors
Abbreviations:
ch= chain
dc= double crochet
hdc=hdc
hdc2tog= half double crochet 2 stitches together: YO, insert the hook into the desired st and bring up a loop. You should have 3 loops on your hook. YO, insert the hook into the next st and bring up a loop. You should have 5 loops on your crochet hook. YO and pull the yarn through all 5 loops on your crochet hook.
First, make the 2 front panels: Use your black colored yarn and make 2.
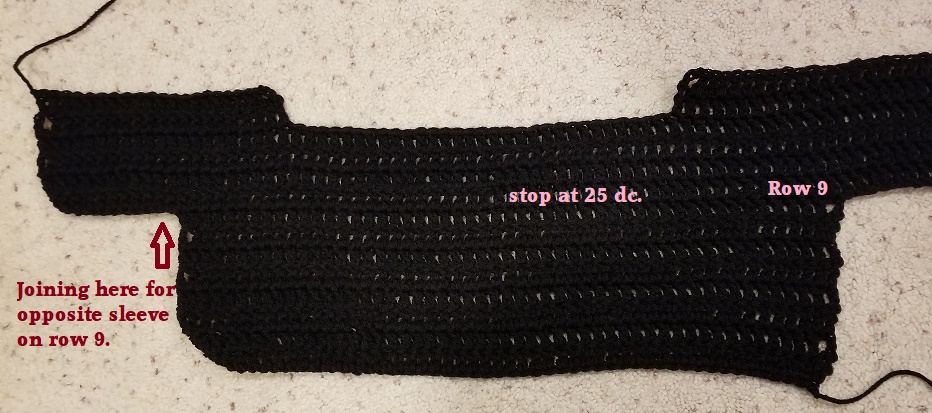
The left and right front panels are both made the same way. Starting chain= ch17 Row 1= Make 1dc into the 4th ch from the hook, 1dc into the next st, and 1dc in every st back across. (15 total st.) Row2 to Row8= *Ch3, turn your work, make 1dc into the next st and 1dc into every st back across. Repeat from * 6 more times. (15 total st. Measures 5” x 5”) Row 9= Ch14, turn your work, make 1dc into the 4th ch from the hook, make 1dc into the next st and 1dc in every st back across. Row 10 to Row12= *Ch3, turn your work, make 1dc into the next st and 1dc into every st back across. Repeat from * 2 more times. (27 total st; 9” width and 3” height). Row 13 = Ch3, turn your work, make 1dc into the next st and 1dc into every st until you have 5 unworked stitches remaining in the row. Leave these last 5 stitches unworked to form the neck. Remember that the neck portion is opposite the sleeve portion of the front panel. Use the picture above as a guide. (22 total st) Row 14 = Ch3, turn your work, make 1dc into the next st and 1dc into every st back across. FO. Leave a long loose yarn end for sewing. (22 total st)
Making the back panel: Use your black colored yarn. Make 1.
Starting chain: ch53
Row 1: Make 1dc into the 4th ch from the hook and 1dc into each of the stitches back across. (51 total st)
Row 2 to Row 8: *Ch3, turn your work, make 1dc into the next st and 1dc into every st back across. Repeat from * 6 more times. (51 total; 17″ x 5″)
Row 9: Ch14 (For the sleeve), turn your work, make 1dc into the 4th ch from the hook, and 1dc into the next st and 1dc into the next 37 stitches (This should bring you to the middle of the back). FO. After you FO on the one side, join your black colored yarn on the opposite side, and then ch14 (We are now making the opposite sleeve), turn your work, make 1dc into the 4th ch from the hook, and 1dc into the next st and 1dc in every st until you meet up with where you finished off with the opposite sleeve. Slst into the top st of the opposite dc. FO. (75 total) Row 10 to Row 12: Join your black colored yarn on one side of your back panel, ch 3, make 1dc into the next st and 1dc into every st back across. *Ch3, turn your work, make 1dc into the next st and 1dc in every st back across. Repeat from * 1 more time. DO NOT FO. We will continue crocheting and make the left neck portion. (75 total st)
Line up your left front panel and your right front panel on top of the back panel. Place your st markers so you know where to stop while forming the back neck portion. Place the 2 st markers in the 23rd st from the left and in the 23rd st from the right. Use the picture above as a guide. Continuing to crochet where we left off:
-Ch3, turn your work, make 1dc into the next st and 1dc into every st until you reach a st marker. Do not dc into the st with the st marker. Ch3, turn your work, make 1dc into the next st and 1dc into every st back across. FO. Repeat the same thing on the opposite side of the back panel. Use the picture above as a guide. (22 total st)
SEWING THE BACK PANEL AND THE FRONT PANELS TOGETHER:
Place the left and right front panels on top of the back panel. Make sure that the neck portions line up and that the “right sides” are facing each other. Sew the top portions of each sleeve, then sew the bottom portions of each sleeve, and lastly, sew both sides together. Turn your work inside out.
Now, you will notice that the neck portion is really loose on the crochet large panda. I will show you how to crochet the collar of the graduation gown now, which will eliminate the gap created by the neck at this time. COLLAR PORTION: Use your black colored yarn. The “right side” of the graduation gown is facing you. Row 1: Join your yarn at the left neck portion to start crocheting the collar. Ch2, make 1hdc into every st until you reach the back of the gown( 14 hdc). Across the back of the gown, hdc2tog until you reach the next neck portion on the opposite side (16 hdc2tog). Make 1hdc in every st until you reach the end of the neck portion on the opposite side (14hdc). Remember, we are only crocheting the collar portion) Row 2: Ch2, turn your work, make 1hdc in every st until you reach the back portion of the gown. Across the back of the gown, *make 1hdc into 3 st and then hdc2tog. Repeat from * all the way across the back of the gown until you reach the next neck portion on the opposite side. Make 1hdc in every st until you reach the end of the neck portion on the opposite side. FO.
Bury any loose yarn ends.
Place the gown on your crochet amigurumi panda. The “right side” should be facing you. Sew the button on the right side, just below the collar portion. Use the space between the dc, just below the collar portion on the left side, as a button hole.
Here is your FREE downloadable Crochet quick, easy, beginner BONUS graduation gown PDF written pattern by
There are affiliate links below, if you are unsure of what affiliate links are please go to “Disclosures/Disclaimers” and “Privacy Policy” at the top of my HOME page. Affiliate links basically allow me to receive a very small referral fee, butonly if you make purchases. Just because you go to the link doesn’t mean that I will receive a referral fee. Thank you so much for considering my affiliate links; I really appreciate it!
“National Read Across America Day is celebrated every year on March 2nd, which is also the birthday of American author Dr. Seuss. This is a day dedicated to encouraging children and young people to read, and motivating parents and teachers to help them do so. The day was created and is hosted annually by the National Education Association.”
I was sitting in a waiting area one day and I was reading “Better Homes & Garden” magazine. I usually end up reading this magazine either in the libraries or waiting areas. There was an article that said: “March 2, is read across America Day. Diving into a book can reduce your stress levels by 68 percent. Reading regularly has also been shown to help sharpen your mind, fend off dementia, and foster empathy.”
Now, I love Better Homes & Garden, but this is my favorite magazine that I always have a subscription for!!! If you would like to check out my favorite magazine, here is the direct affiliate link: Helenmay’s favorite magazine! If you would like Better Homes & Garden, here is the direct affiliate link: Better Homes and Garden Magazine.
I have a really fun recipe that I will be sharing soon on my Favorite Recipes blog post. I got it out of my favorite magazine. I just LOVE the recipes in this magazine! This recipe has become a healthy regular in our family. I am going to share it soon as a fun Easter recipe. 🙂 You may like to check out my Fun With Rabbits blog post too.
Most of you that follow my Helenmay Crochet YouTube Channel know that I love books, especially for young children. I love to foster a love for books in my family too. Today, I wanted to share my favorite book when I was a teenager.
Click here, or the picture above to go directly to the affiliate link. This is still my favorite movie based on Wilson Rawls book, which is available on Amazon Prime: Where the Red Fern Grows Movie
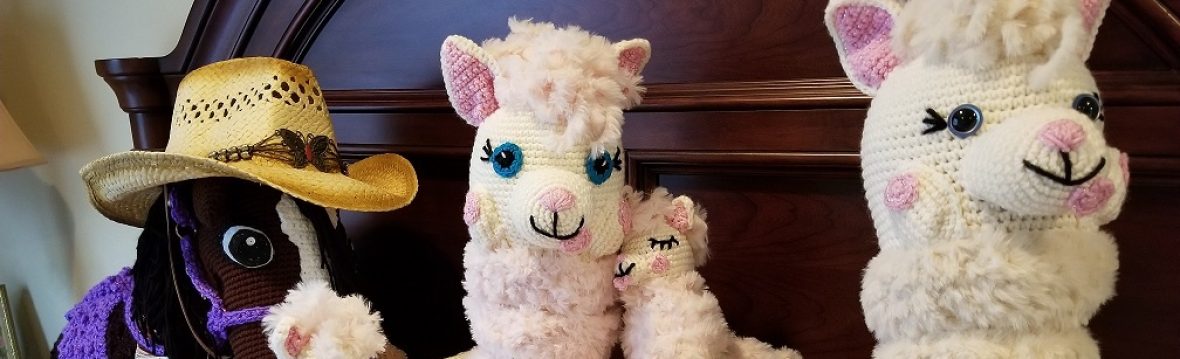
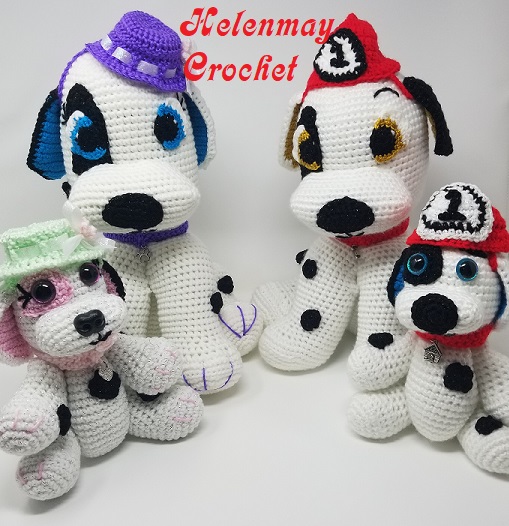
I have crochet hound dogs that you may like to go with this book.
Click on the picture above, or here, to go directly to the YouTube video tutorial.
I am known for my Helenmay Crochet Dogs! If you would like to check out all of my other fun Helenmay Crochet Dog tutorials and links, here is the direct blog post: Helenmay Crochet Dogs.
If you would like to check out book deals by the amazing Dr. Seuss, click the picture below, or here, for the affiliate link:
Happy Read Across America Day!!!! Happy Birthday Dr. Seuss!